
Transactional Workflows
At the heart of transactions within Bixby is the ability of an action to have external side effects, such as adding a product to an order, canceling an order, and finalizing an order.
There are three possible phases in a transactional workflow:
- The Transaction phase, where the user can do things like prepare a cart by adding, removing, and updating items.
- The Commit phase, where the user confirms the transaction and Bixby completes the transaction, like placing an order or confirming a reservation.
- The Activity phase, where the user can do things like interact with the order after it has been committed. For example, users can check their order status or cancel a dinner reservation.
Note that it is not necessary for a transaction to have all three phases to be considered a transaction. For example, you can create a capsule that only has a Transaction and Commit phase to transfer money between accounts.
When you want to include transactions as part of your capsule, you must tag your actions with appropriate action types and ensure that the related concepts include appropriate concept features. Additionally, you need to add the appropriate *-support files to your capsule, to handle the various states of the transaction.
Let's talk about each of these phases and how to implement a transaction using a simple shirt ordering capsule. You can download the full capsule from GitHub to view all the files. You can also read the full walkthrough of the shirt capsule in the Basic Cart Transactional Sample Capsule.
This figure shows the actions that make up a transactional workflow for the shirt ordering capsule:
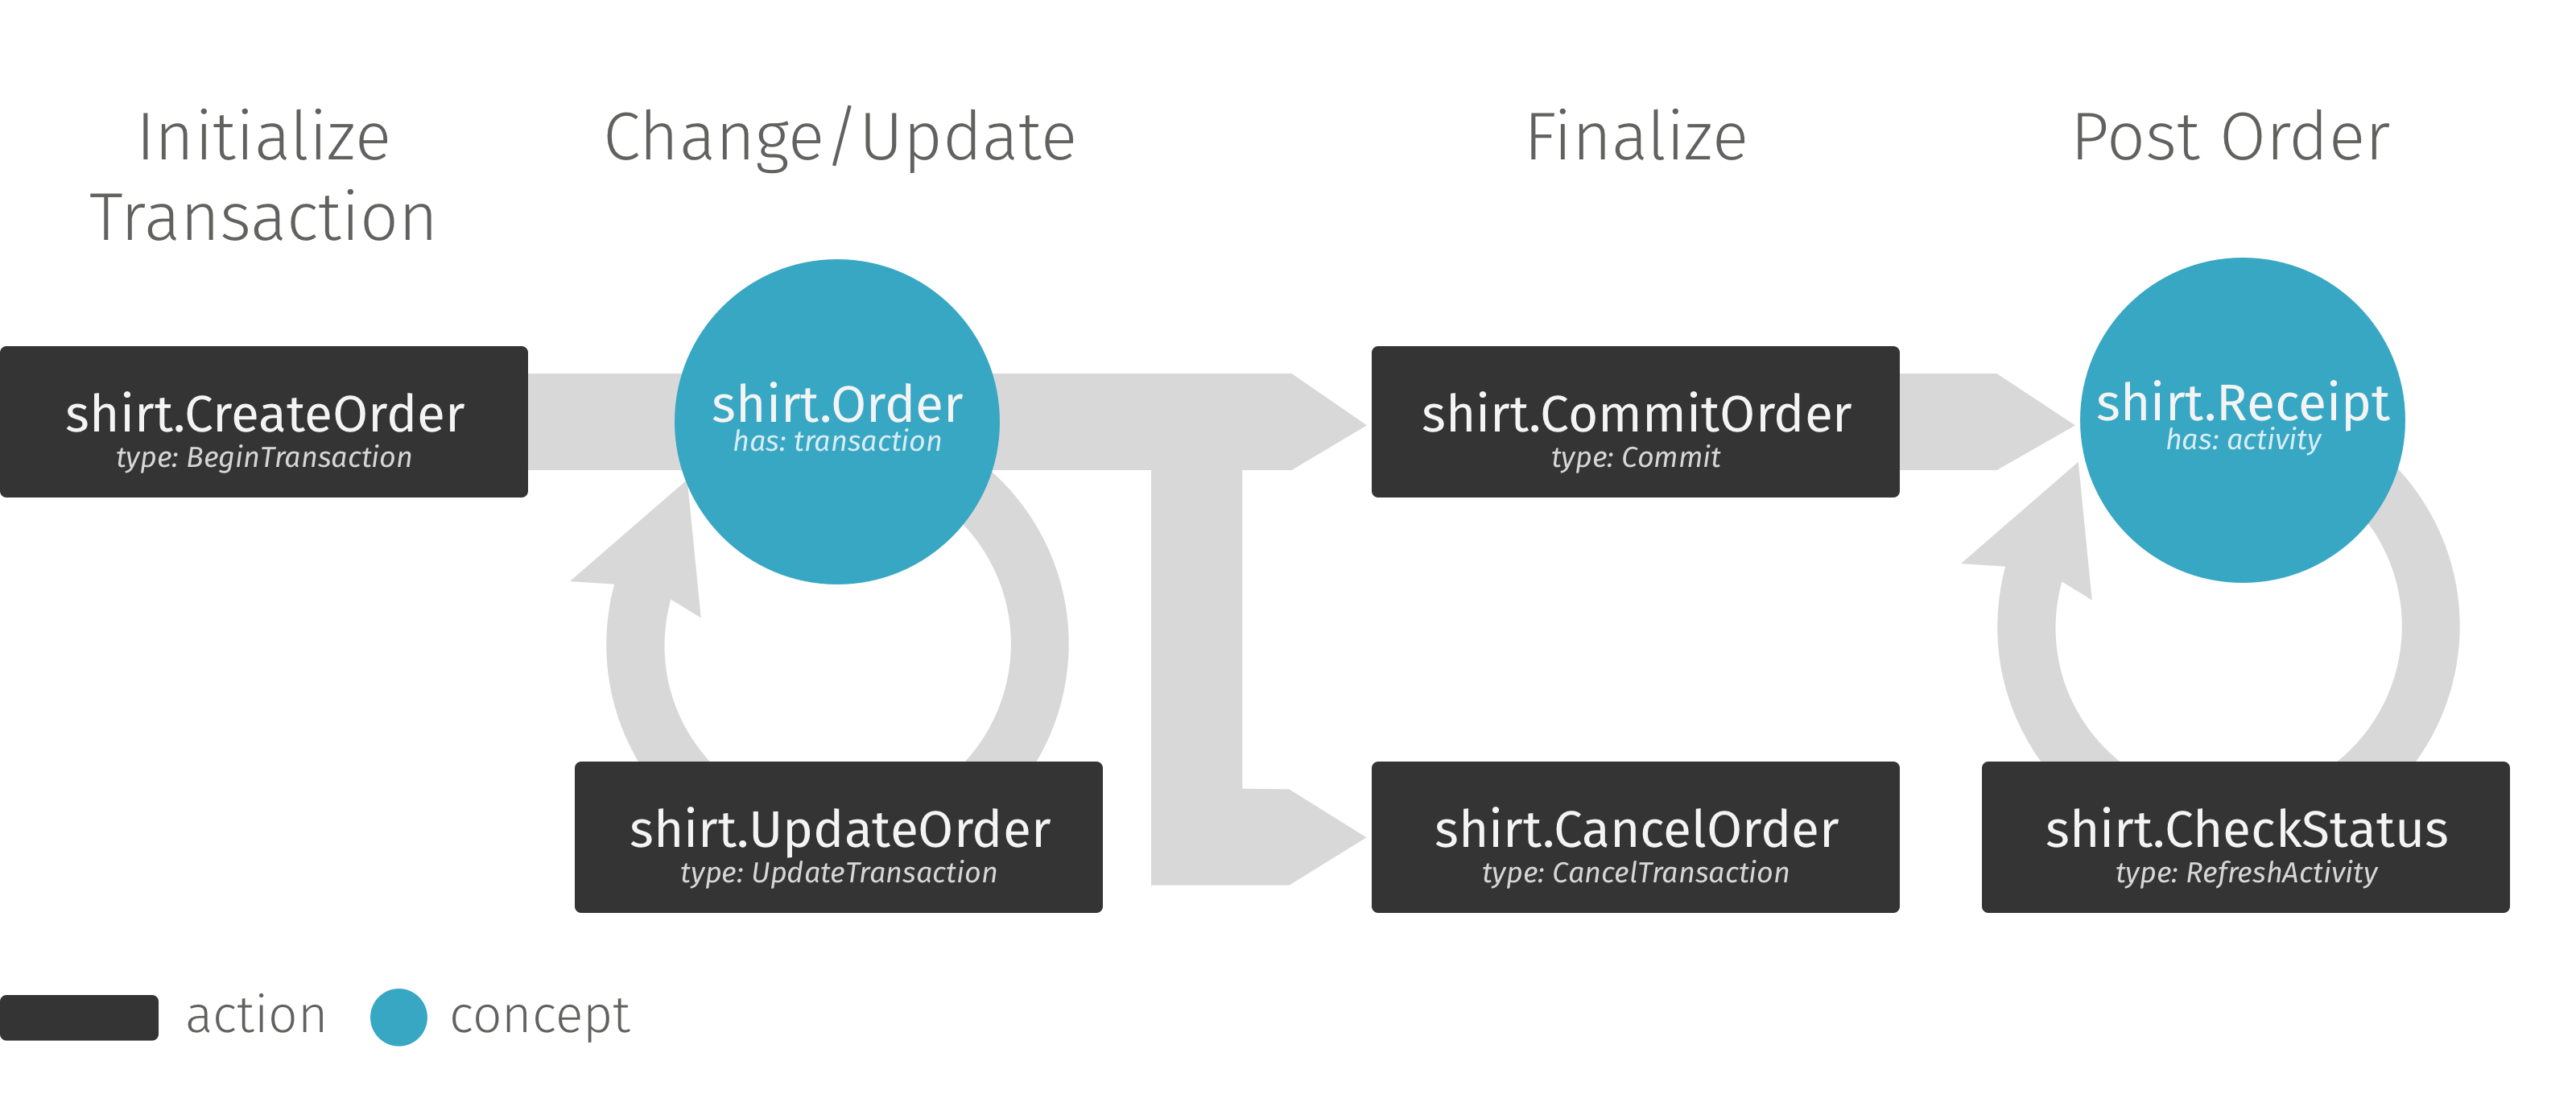
(Select the image to view a large version)
Here, the user starts the transaction in only one way: through CreateOrder, which initializes the Transaction phase. From here, the user can change the size of the shirt through UpdateOrder, which updates the transaction state. This transactional object remains available until the transaction is concluded. The user must either commit or cancel the order through CommitOrder or CancelOrder, which are of type Commit and CancelTransaction, respectively. Finally, the user can use CheckStatus to check on the status of the shirt order during the Activity phase.
If your capsule requires payment in order to fulfill a transaction, you need to allow the user to punch out of Bixby to complete the transaction.
Action Types
When modeling actions, you must include an action type, as shown in the diagram above. Bixby has specific action types that you can use when there is a transaction state being held externally. Bixby doesn't hold state internally, and you need special UX to let the user know how to deal with the external state.
The types are grouped by whether they happen before, during, or after the Commit.
Before Commit Action Types
These are all action types that happen before a Commit happens, which are typically during the transaction phase. The models that use transaction action types should have a corresponding transaction-support model defined in a *.transaction.bxb file. The transaction-support information is primarily used to display the status bar and to handle any situation in which the user quits the transaction before committing. For more information, see Transaction and Activity States.
The action types are as follows:
BeginTransaction
Let's start from the beginning with BeginTransaction, which is the action type that denotes the beginning of a transaction.
In the case of the shirt capsule, you want to start the order process with a shirt item:
action (CreateOrder) {
  type (BeginTransaction)
  collect {
    input (initialItems) {
      type (InitialItems)
      min (Required)
      max (One)
      default-init {
        intent: goal: CreateItems
      }
    }
  }
  output (Order)
}UpdateTransaction
Once a transactional flow has begun, use the UpdateTransaction action type to modify it.
If users want to change their shirt size for example, this action is triggered:
action (UpdateOrder) {
  type (UpdateTransaction)
  collect {
    //the order that is updated
    input (order) {
      type (Order)
      min (Required)
    }
    input-group (updates){
      requires (OneOrMoreOf)
      collect {
        input (addedItems) {
          type (AddedItems)
          min (Optional)
          max (One)
        }
        input (changedItems) {
          type (ChangedItems)
          min (Optional)
          max (One)
        }
        input (removedItems) {
          type (RemovedItems)
          min (Optional)
          max (One)
        }
      }
    }
  }
  //returns the updated order
  output (Order) {
    throws {

       error(NoItems) {
        on-catch {
          halt {
            dialog {
              macro (NoItemsInCart)
            }
          }
        }
      }
    }
  }
}
CancelTransaction
If the user reconsiders and cancels the shirt order before completing the transaction, you can mark the termination of a transaction using CancelTransaction.
action (CancelOrder) {
  type (CancelTransaction)
  collect {
    input (order) {
      type (Order)
      min (Optional)
      validate {
        if (!exists(order)) {
          halt {
            dialog {
              template ("Okay.")
            }
          }
        }
      }
    }
  }
  output (Receipt)
}Commit Action Types
Notice that there is only one Commit action type.
Commit
If the user is happy with the shirt and completes the order, you can use Commit to mark the successful completion of the transaction. This action type accepts a transaction value and normally returns a receipt:
action (CommitOrder) {
  type (Commit)
  collect {
    input (order) {
      type (Order)
      min (Required)
    }
  }

  confirm {
    by (core.Confirmation)
  }

  output (Receipt)
}
After a Commit action type has completed, all capsule pages leading up to the Commit (and potentially containing stale data) are deleted from the client.
If you need to track the status of your concept after it has been committed, the output of your Commit action should be a structure concept the Concept Features.
After Commit Action Types
These are all the action types for after a user has committed, which typically happen during the Activity phase.
Activities are all events and interactions with the user that happen after a commit has occurred. You must create an activity when defining a concept you need to track after a Commit occurs. For the shirt example, you see this when the user wants to track a shirt order. All Activity concepts must have a corresponding activity-support model defined in an *.activity.bxb file. This file displays information depending on the current state of the activity and are not necessarily defined by your defined state of the Activity. For more information, see Transaction and Activity States.
Here are the after commit action types:
RefreshActivity
After the transaction is complete, you can continue to refresh the activity value by checking on the external system. For the shirt ordering example, the user has the option of checking on an existing shirt order with RefreshActivity. For more information on refreshing, see Refreshing Your Content.
action (CheckStatus) {
  type (RefreshActivity)
  collect {
    input (receipt) {
      type (Receipt)
      min (Required)
      default-init {
        intent {
          goal: FindLastReceipt
        }
      }
    }
  }
  output (Receipt)
}CancelActivity
Finally, if the user decides to cancel the transaction after it is complete, you can use CancelActivity. Your capsule then ceases to track activity values after they have been canceled.
action (CancelCommittedOrder) {

  type (CancelActivity)

  confirm {
    by (core.Confirmation)
  }

  collect {
    input(receipt){
      type(Receipt)
      min (Optional)

      default-init {
        intent {
          goal: FindLastReceipt
        }
      }

      validate {
        if (!exists(receipt)) {
          halt {
            dialog {
              template("Not sure what to cancel. I didn't find any recent shirt orders.")
            }
          }
        }
        if (exists(receipt) && receipt.orderState != 'Ordered') {
          halt {
            dialog{
              template("This order is already #{value (receipt.orderState)}!")
            }
          }
        }
      }
    }
  }

  output(Receipt)
}Concept Features
For structure and structure-enum concepts, you need to tag them with the corresponding transaction or activity features.
For example, in the shirt ordering example, the following structure representing an order includes a features key indicating that this concept should be tracked as part of an ongoing transaction:
structure (Order) {
  property (items) {
    type (Item)
    min (Optional)
    max (Many)
  }
  property (orderNumber) {
    type (OrderNumber)
    min (Required)
  }
  property (totalPrice) {
    type (Price)
    min (Required)
  }
  property (holdTime) {
    type (HoldTime)
    min (Required)
  }
  features {
    transaction
  }
}On the other side of the transaction, the shirt ordering example provides a receipt, which needs to be tagged as an activity, since it is used after the transaction is complete.
structure (Receipt) {
  property (order) {
    type (Order)
    min (Required)
    max (Many)
  }
  property (orderState) {
    type (OrderState)
    min (Required)
  }
  property(statusRefreshTime) {
    type(time.DateTime)
    visibility(Private)
    min (Required)
  }
  features {activity}
}Transaction and Activity States
Along with tagging concepts for features indicating that the concept has a state, you need to define what happens in those concept states.
Within a Transaction file (*.transaction.bxb), you can define transaction-support for ongoing transactions. Within an Activity file (*.activity.bxb), you can define activity-support, for completed transactions.
For example, in the shirt ordering example, one of the structure concepts is a shirt order (Order), which has transactions that can partly be handled with this transaction-support file:
transaction-support {
  match {
    Order (this)
  }
  confirm-on-abandon {
    message ("Are you sure you want to quit your order?")
    on-retain {
        goal {
          CommitOrder
        }
    }
  }
}
In this Transaction, you see a transaction-support, which provides users a way to confirm if they want to abandon a transaction and start a new one. The transaction-support also indicates that a concept is part of an ongoing transactional flow.
The counterpart to transaction-support is activity-support, which indicates that a concept is part of a completed transactional flow:
activity-support {
  match {
    Receipt (this)
  }
  time (statusRefreshTime)
  states {
    if (orderState == 'Ordered') {
      state (Scheduled) {
        expires(statusRefreshTime)
        summary-view {
          message {
            template ("#{value(orderState)} #{value(order)}")
          }
          title {
            template ("#{value(order)}")
          }
          details {
            template ("#{value(orderState)}")
          }
        }
        detail-view {
          render {
            layout-match (this) {
              mode (Details)
            }
          }
        }
      }
    } else-if (orderState == 'Shipped') {
      state (Relevant) {
        expires(statusRefreshTime)
        summary-view {
          message {
            template ("#{value(orderState)} #{value(order)}")
          }
          title {
            template ("#{value(order)}")
          }
          details {
            template ("#{value(orderState)}")
          }
        }
        detail-view {
          render {
            layout-match (this) {
              mode (Details)
            }
          }
        }
      }
    } else { //orderState == 'Delivered' || orderState == 'Cancelled'
      state (Recent) {
        summary-view {
          message {
            template ("#{value(orderState)} #{value(order)}")
          }
          title {
            template ("#{value(order)}")
          }
          details {
            template ("#{value(orderState)}")
          }
        }
        detail-view {
          render {
            layout-match (this) {
              mode (Details)
            }
          }
        }
      }
    }
  }
}In this Receipt structure, you see an activity-support that has a control flow for post-order statuses: "Ordered", "Shipped", and "Delivered". You also see the Scheduled, Relevant, and Recent states, which are Bixby-specific values that indicate that an activity is scheduled, in progress, or complete, respectively. If the user wants to get the latest status of a shirt order using RefreshActivity, these statuses inform the user of the various external states.
You do not need to define a specific order state for the control flow. Instead, you might want to use Expression Language. For example, you can check if the time that a reservation was made for is upcoming, current, or past and match it to a corresponding state.
On the JavaScript side, you can look up transactions with the transaction JavaScript API.
import transaction from 'transaction';
// FindLastReceipt
export default function () {
  //look up last receipt from viv cloud
  return transaction.retrieve('example.shirt.Receipt', 'ALL', 1);
}
You can learn more about transaction, activity, and related concept states in reference documentation.
Selection Prompts
If more than one function implements an action that has external effects, the execution cannot proceed without a selection being made. Bixby shows a prompt asking them to choose the implementation they would like to use for the transaction. Once the user makes a choice, execution can continue using the chosen function. To learn how to automatically make selections on behalf of the user, refer to Selection Rules.
You can learn more about Selection Prompts.
Updates with Activity Cards
As briefly described in the shirt Sample Capsule Walkthrough, there are three distinct phases during a transactional workflow: the transaction, commit, and activity phase. The activity phase, and the accompanying Activity Card, gives you an opportunity to provide updates in a receipt to users about their upcoming event, such as a party they've RSVPed to, a hotel they've booked, or an item they've ordered. Essentially, any transaction that represents a "receipt" state is now considered an Activity.
The corresponding look-and-feel of the activity (with dialogs and layouts) primarily lets you do one of two things:
- Give updated information, in case the previous state of the user's receipt is stale. For example, if a user ordered a ride share, they would want regular updates on where the car is and how soon they will be picked up.
- Give more information that is relevant to users that wasn't available or relevant before. For example, if a user checks their flight status four hours before the flight, they just want to know if it's on time. Once they're closer to the flight's departure, they can refresh the
activityto show the flight time and the gate.
These activity cards are shown:
- In the Bixby Main page, when there's an upcoming activity.
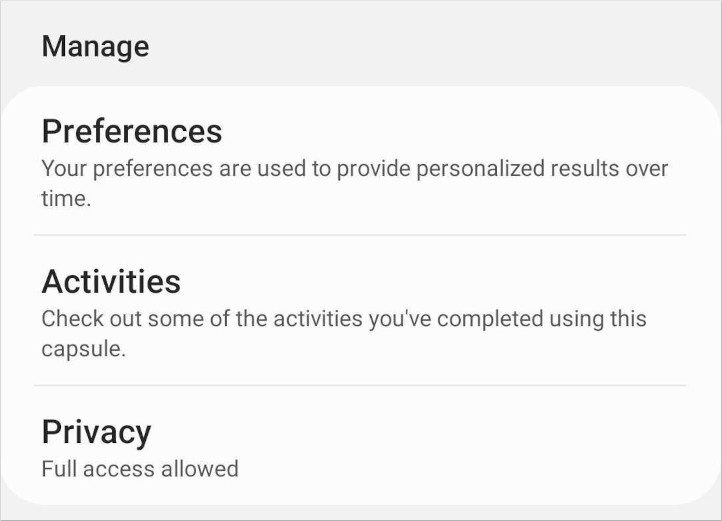
- In the Activities tab of the Manage section in the capsule's page. All past transactions are stored here, as well as all upcoming activities. Activities in the
Recentstate are here and will not display in the Bixby Main page.
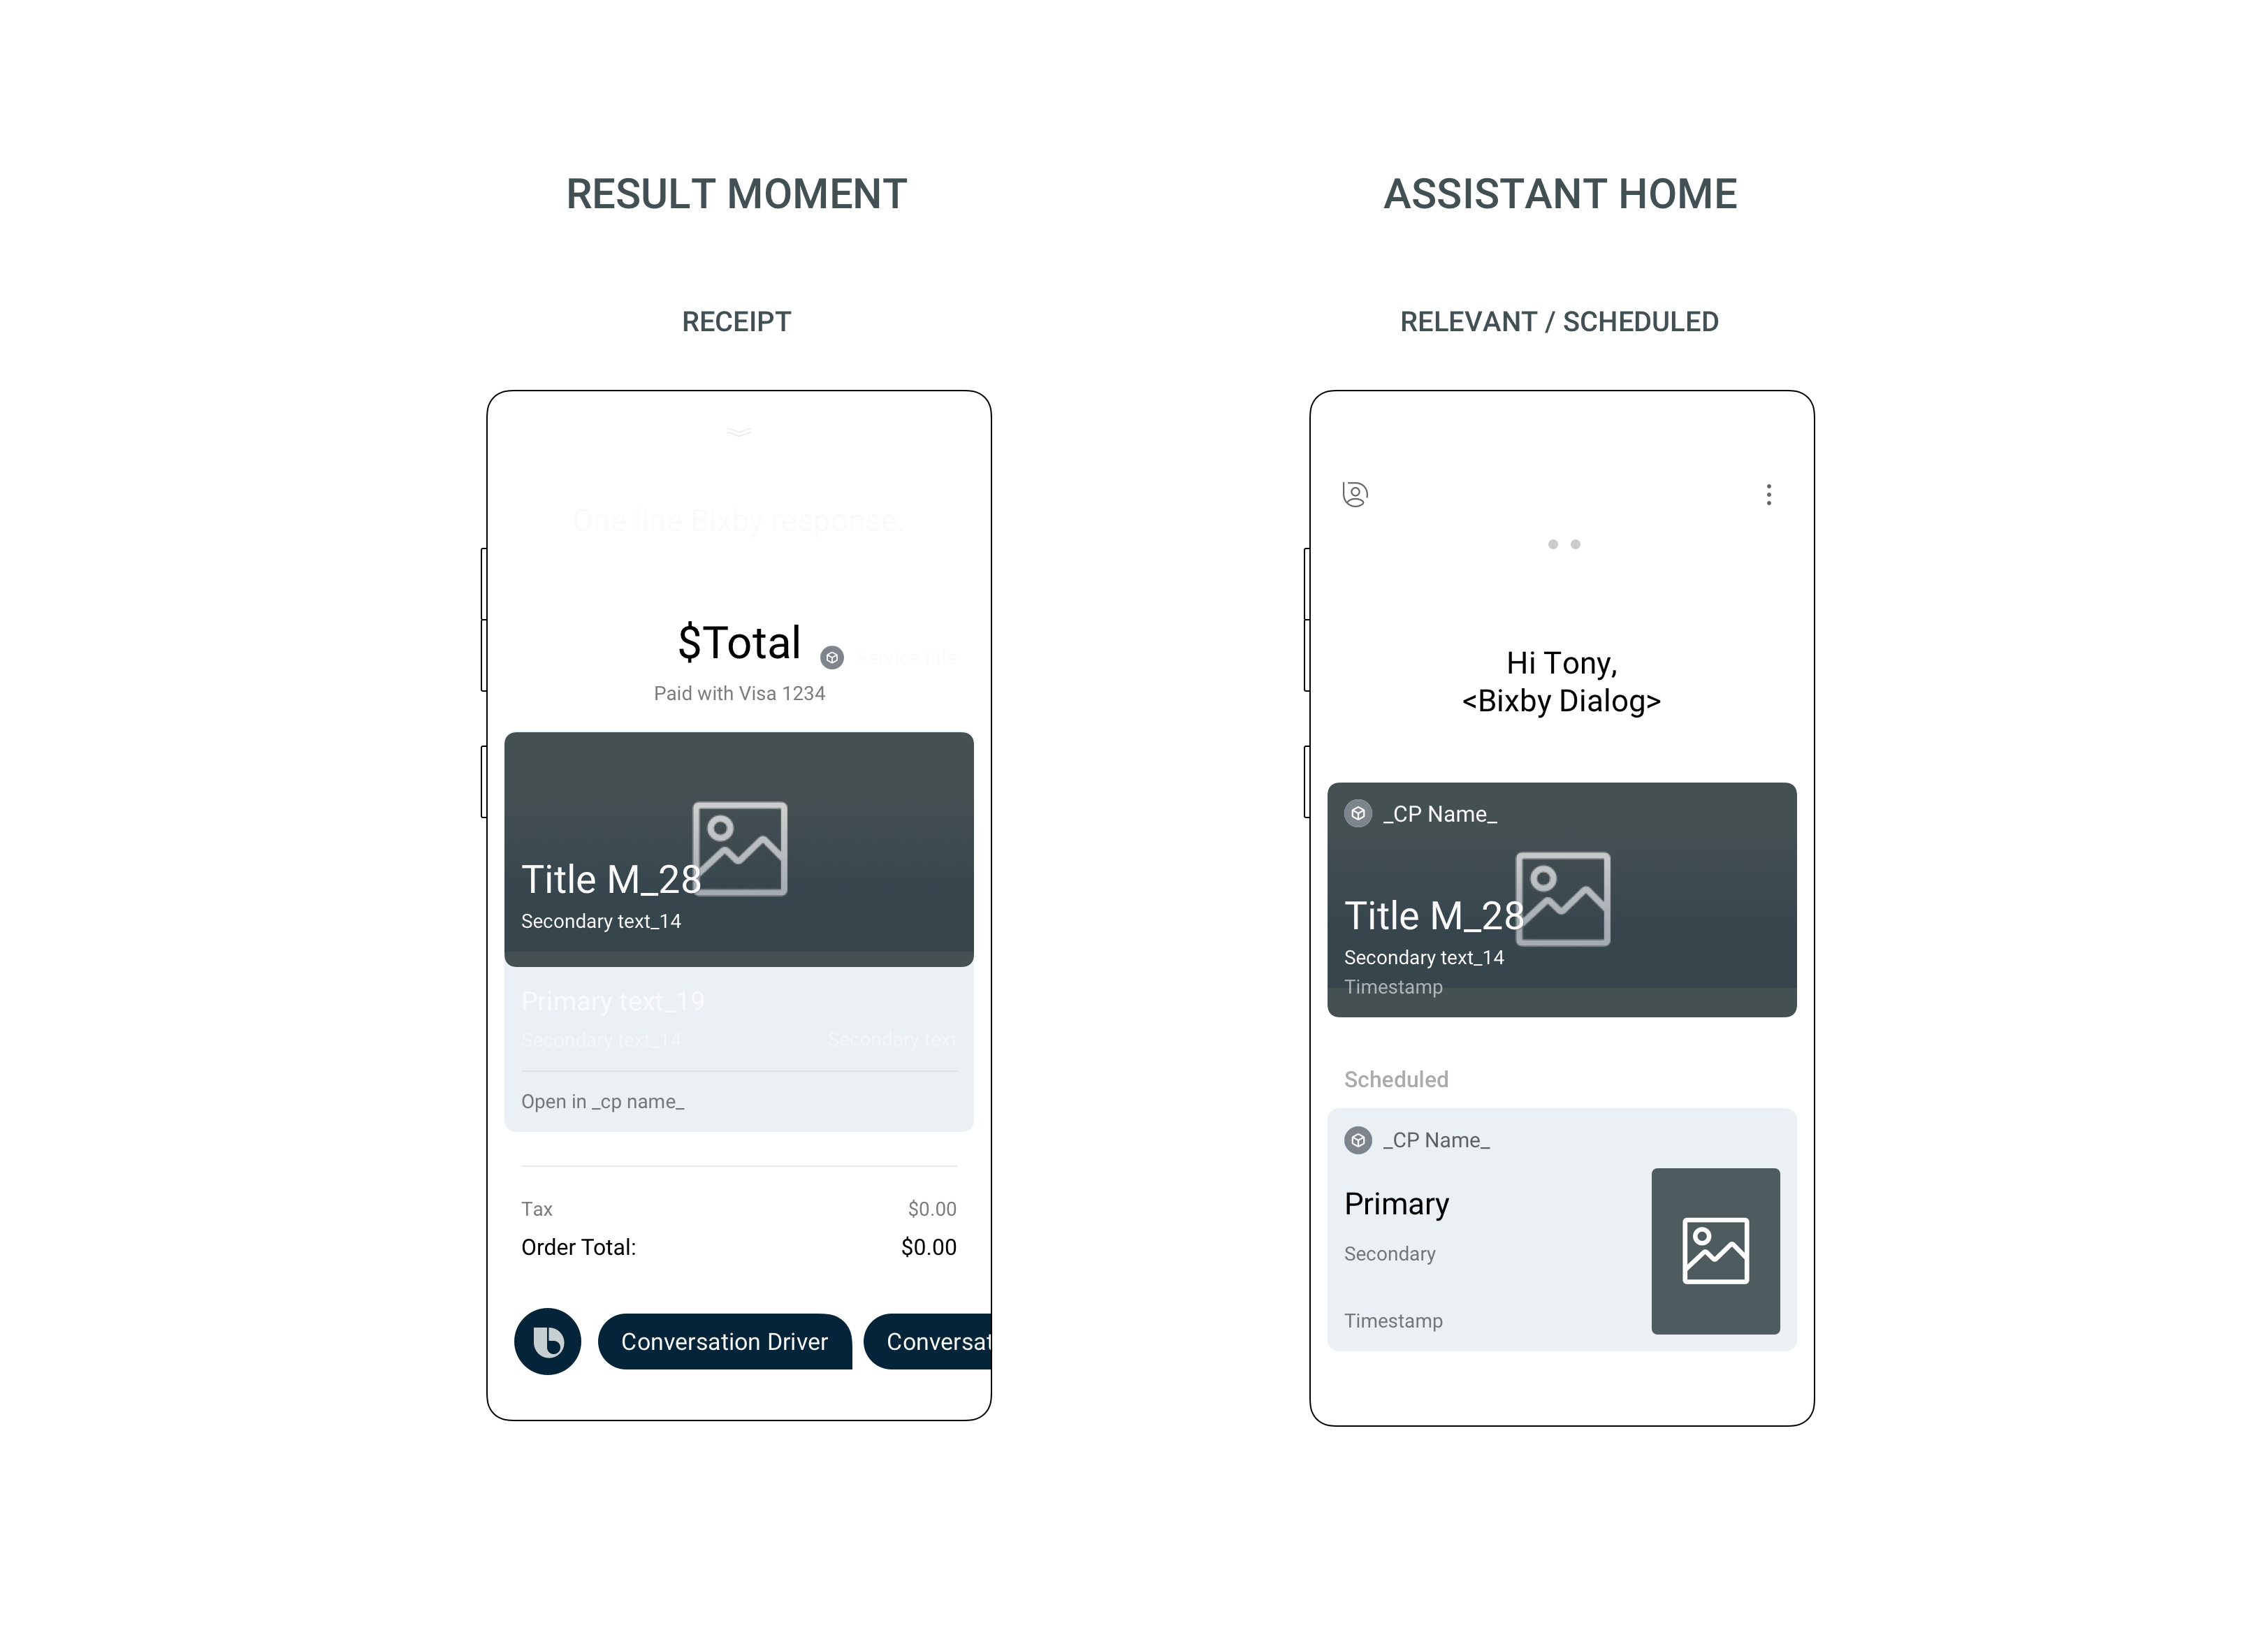
What Is Displayed in an Activity Card
When in a summary-view for Activity Cards, there is a primary slot, a secondary slot, and dialog for Activity Cards in the Bixby Main page and the capsule's Manage tab under the recent history. The content for these various slots is determined by the message, title, and details keys in summary-view. The Timestamp slot is determined by the required time key. You can also add an image to your Activity Card with image-url.
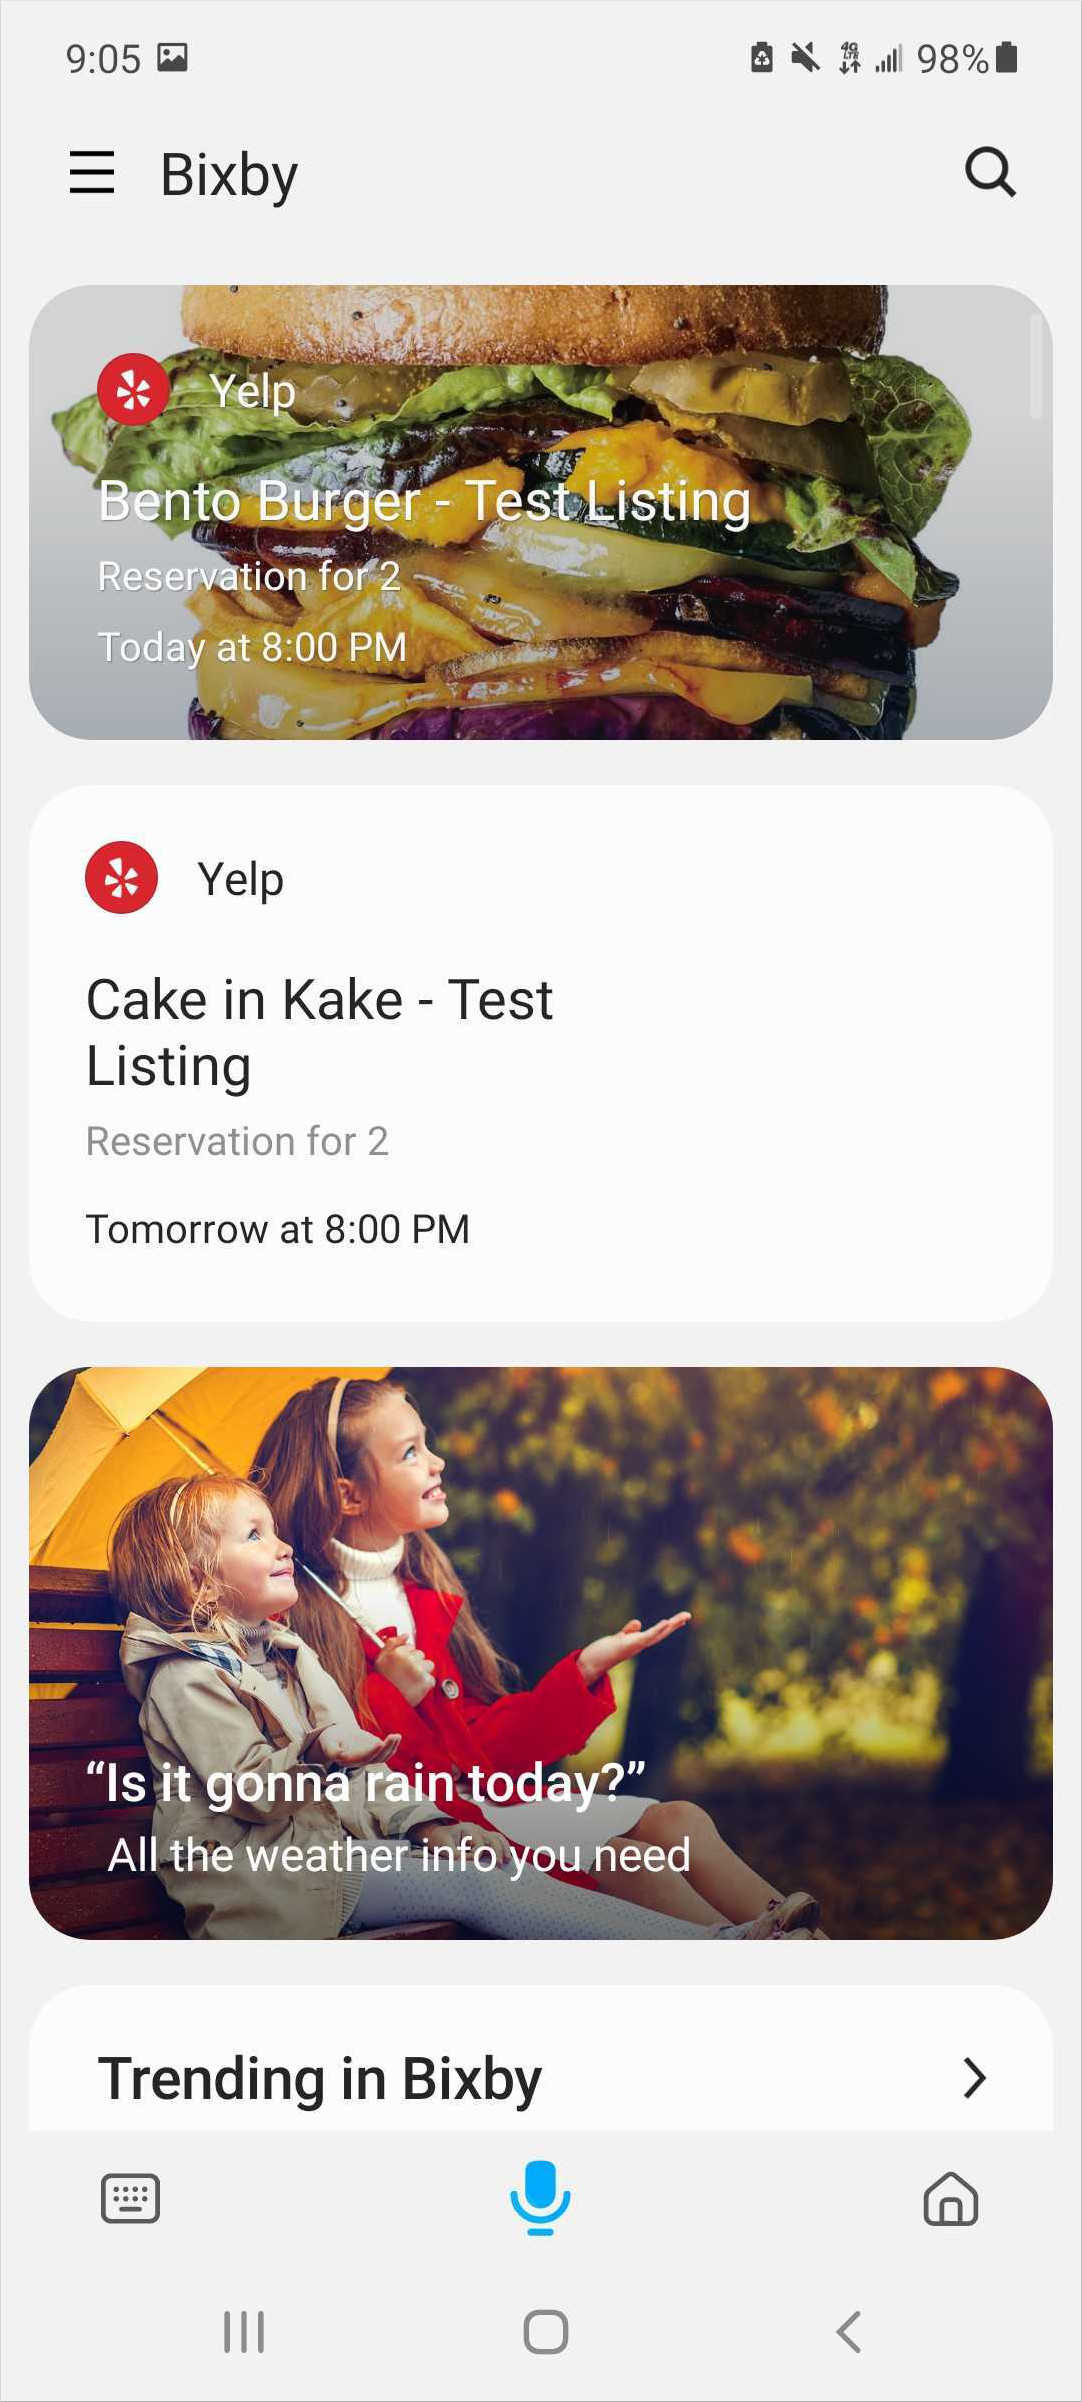
The look-and-feel of an Activity Card changes depending on the defined keys, the card's position in the Bixby Main page, and its current state. The following diagram and list shows which slots show which information (and the key it pulls that information from) in the Summary View of your activity.
- If set to
Relevant, the card is listed closer to the top of the Bixby Main page.- Additionally, if a card is listed first and if an image is specified, the image will cover the card. Cards listed below it will have any images as a right-side square thumbnail.
- If
messageis specified, then the primary slot displaysmessage, and the secondaryslotdisplays title and details. Ifmessageis not specified, then the primaryslotdisplaystitleand the secondary slot displaysdetails. - Time is listed at the bottom.
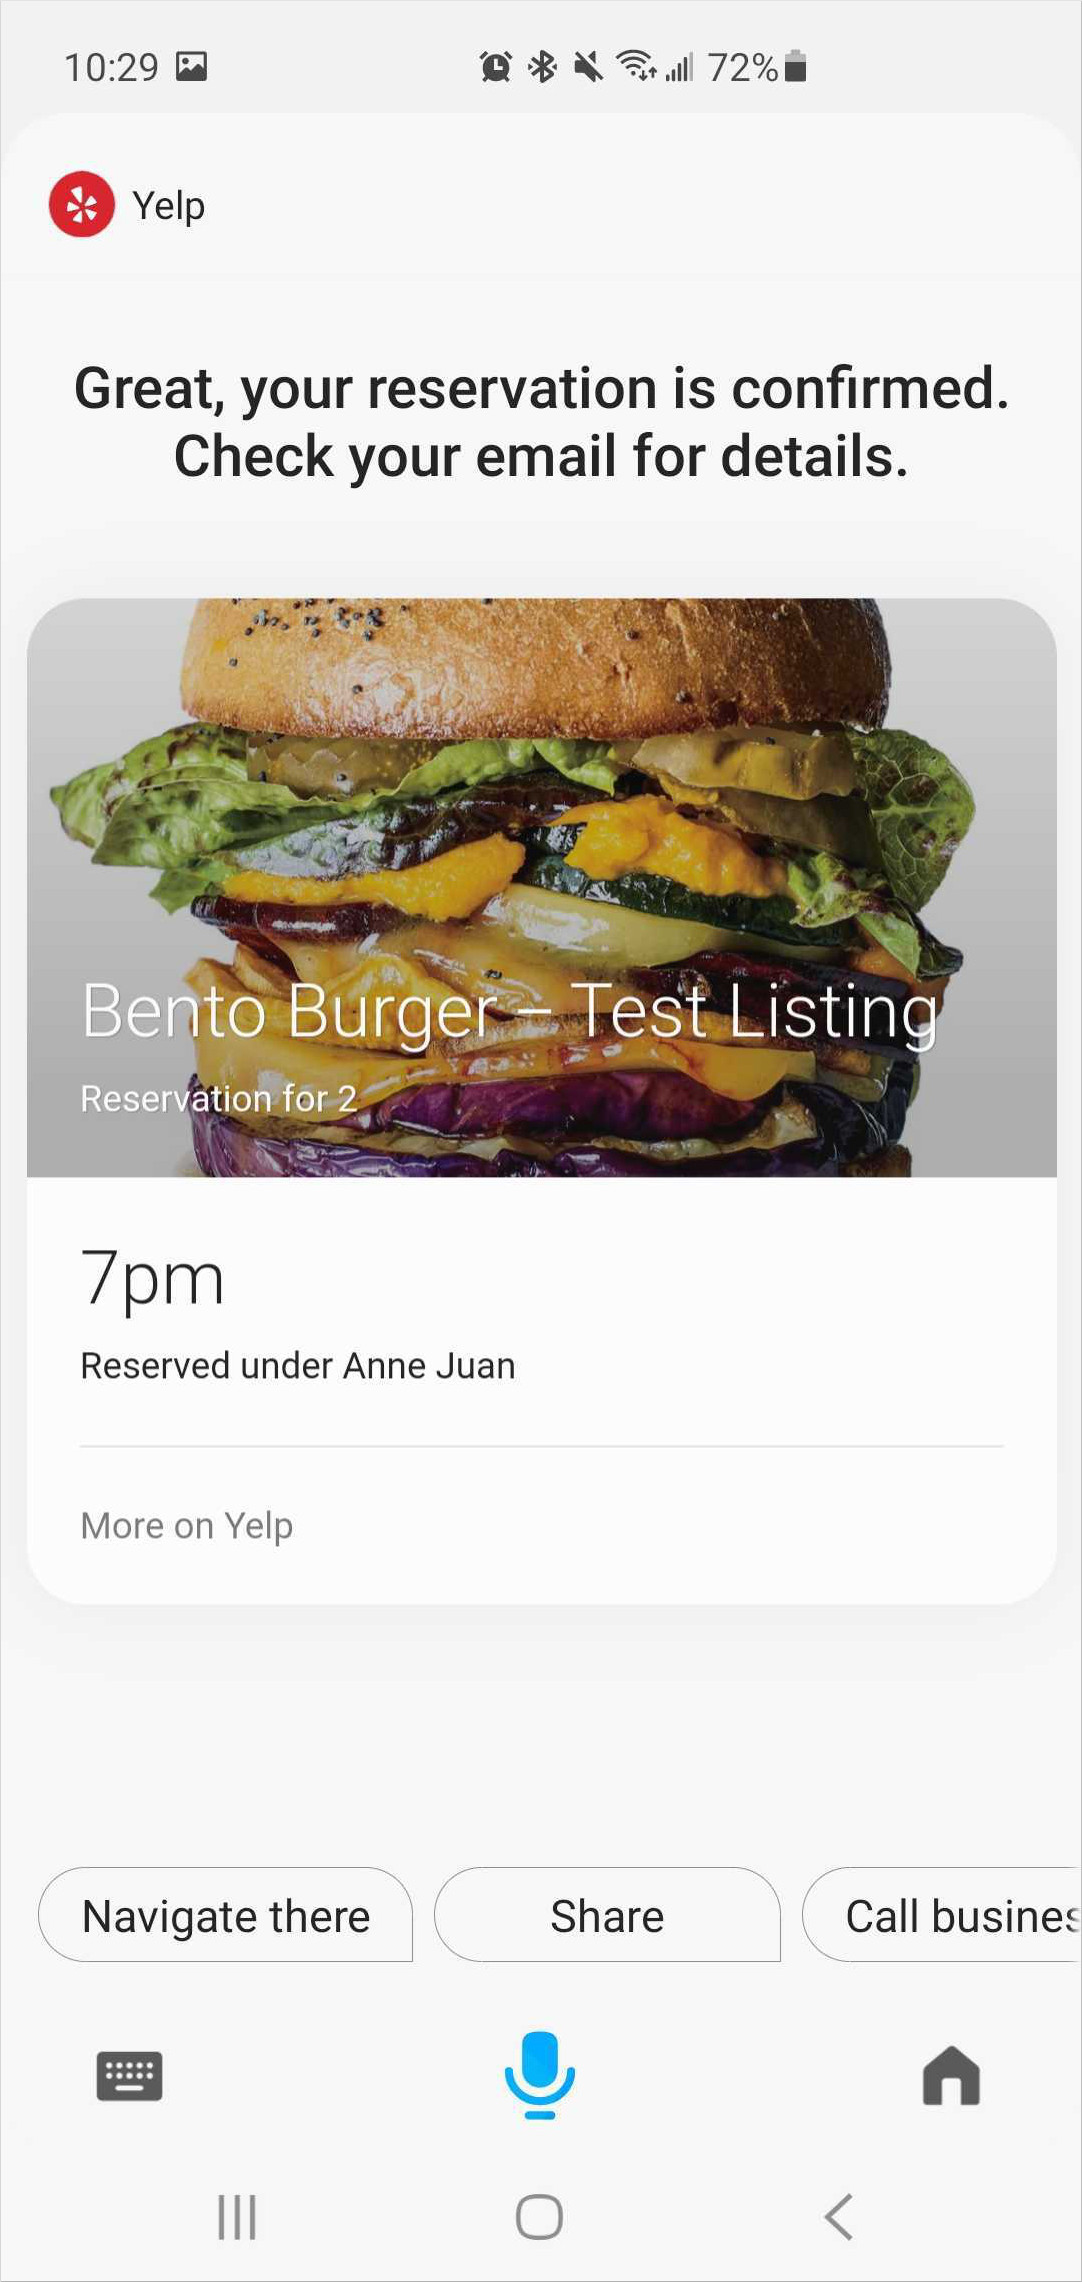
Here are some cards listed in the Relevant state:
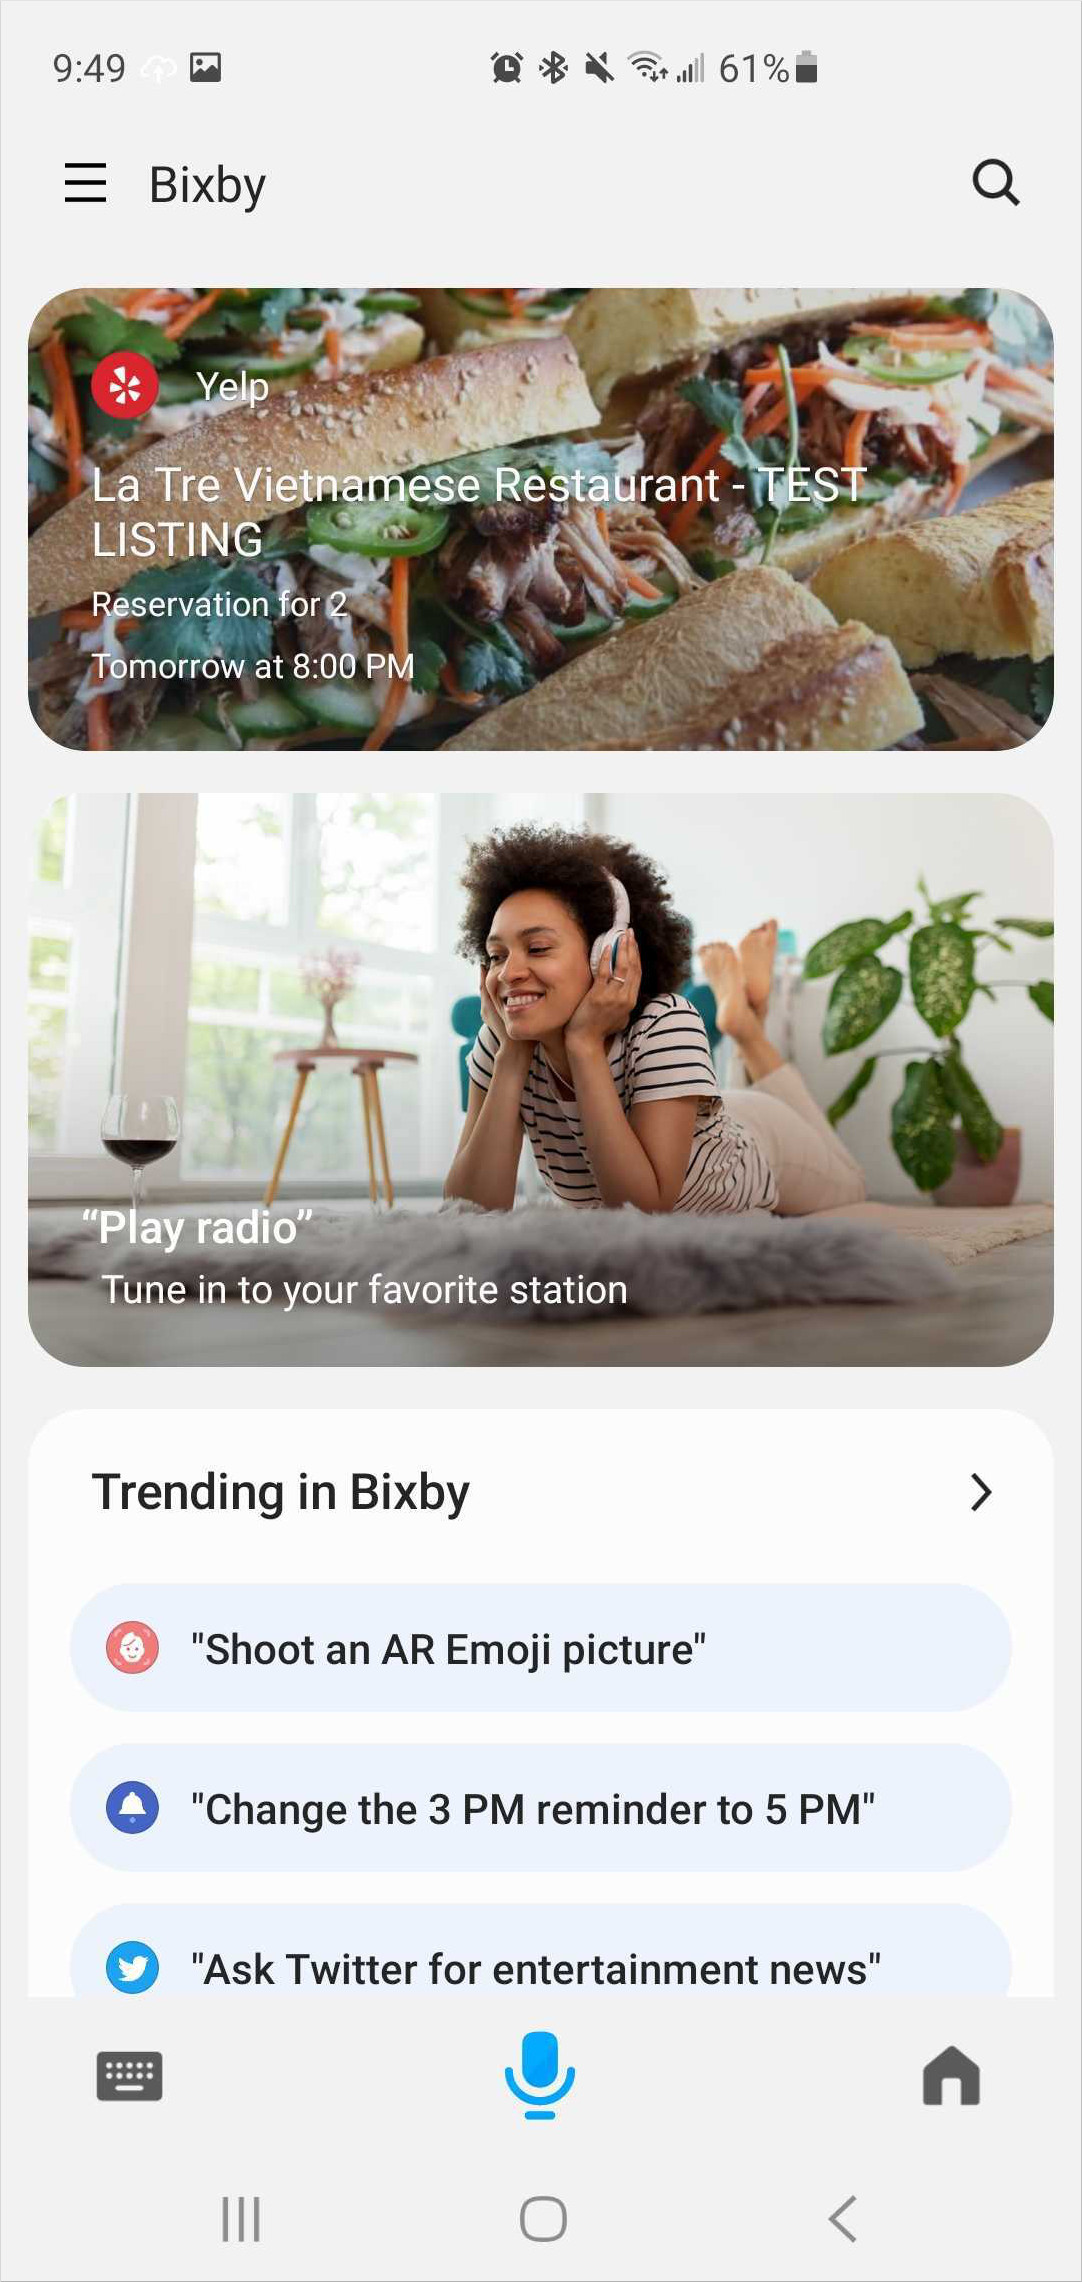
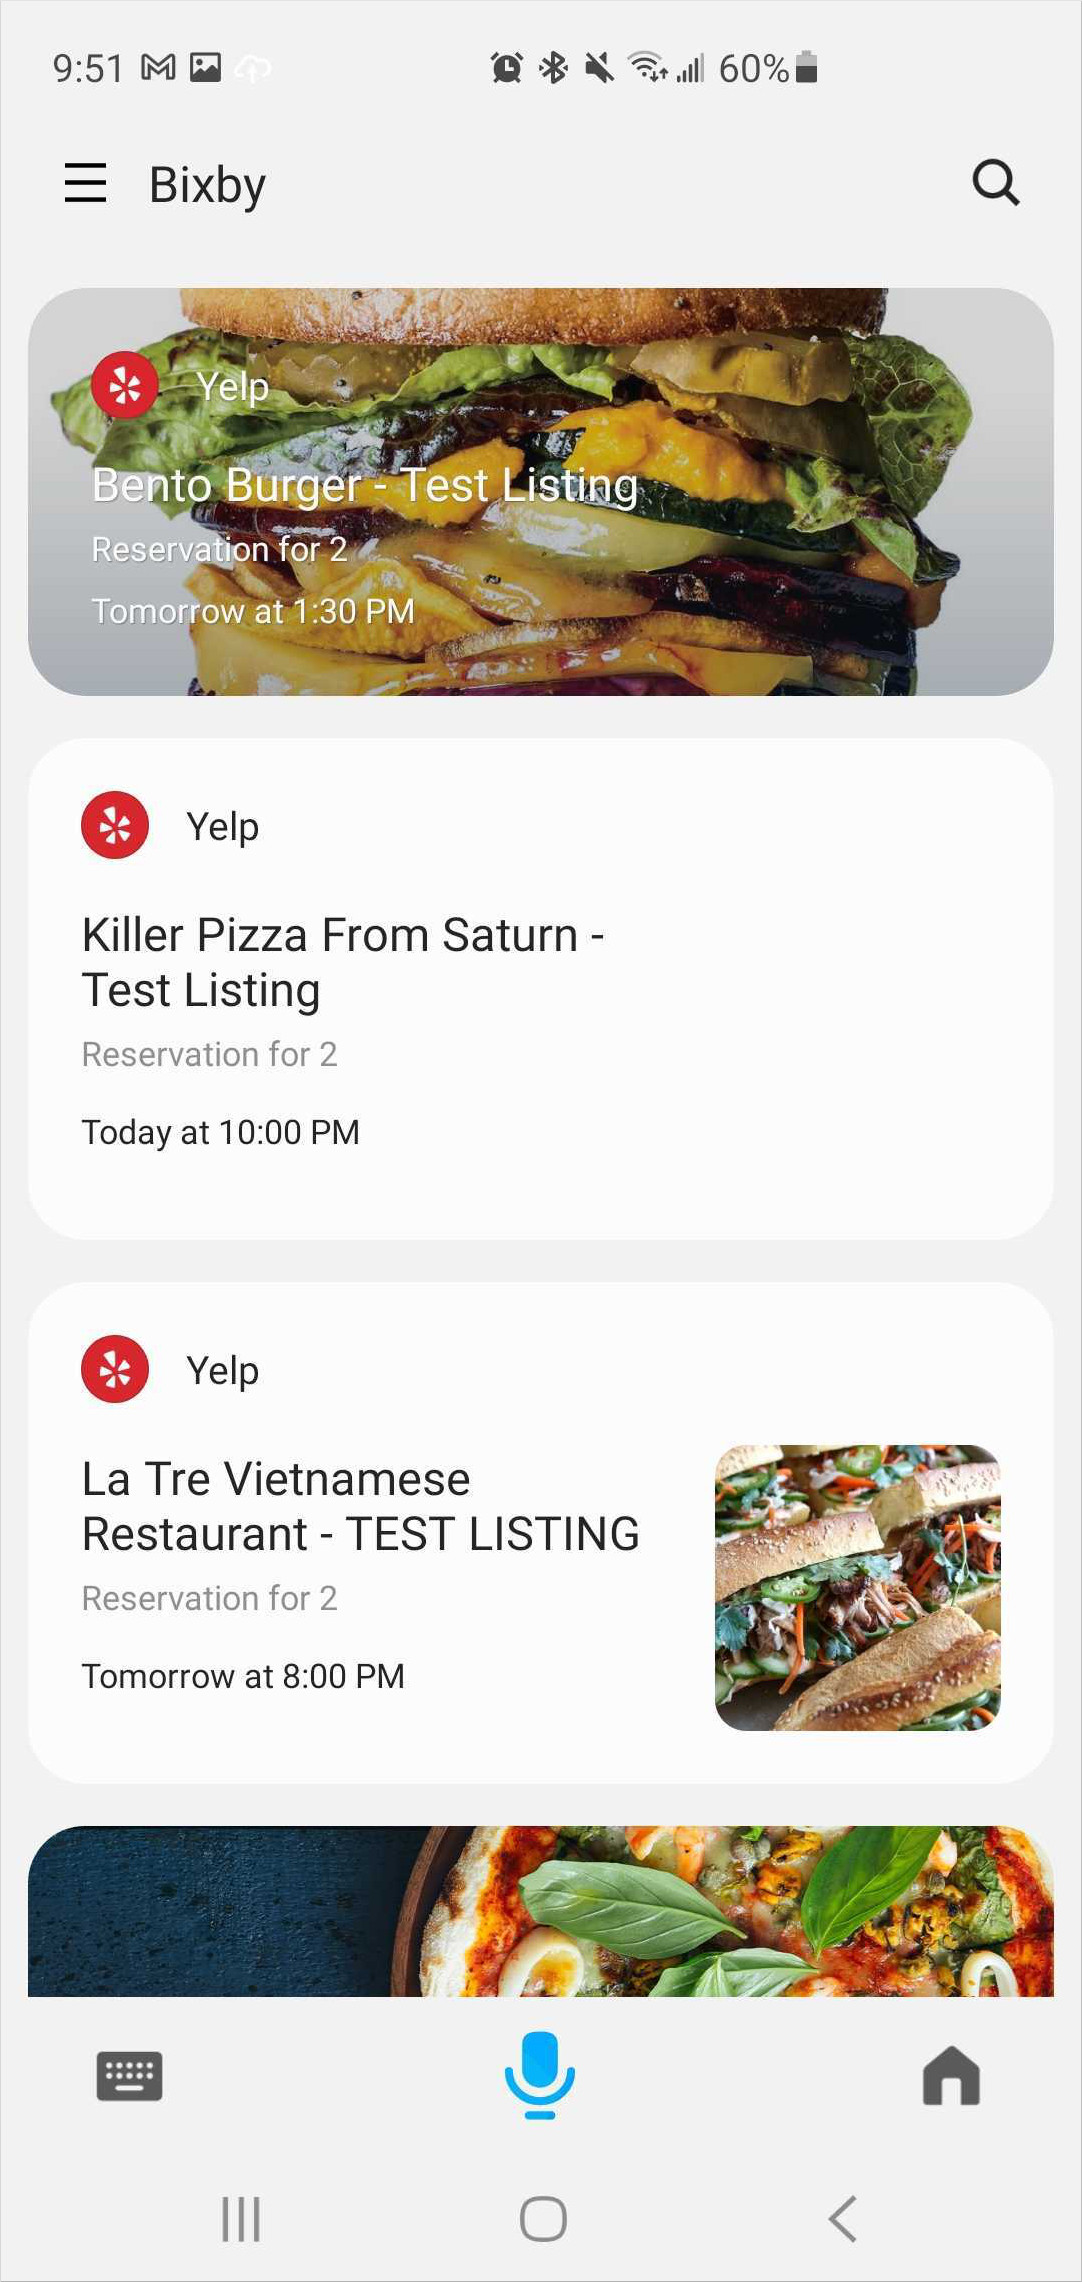
- If set to
Scheduled, the card is placed at the very end of Bixby Main page, often under a "Coming Up" header. These cards can have a thumbnail image on the right defined by theimage-url. Additionally:- If
messageis defined,messageis the first and biggest text,titleanddetailsare as small text underneath, thentimeis at the bottom. - If
messageis undefined,titlewill be the first and biggest text, withdetailsandtimebelow.
- If
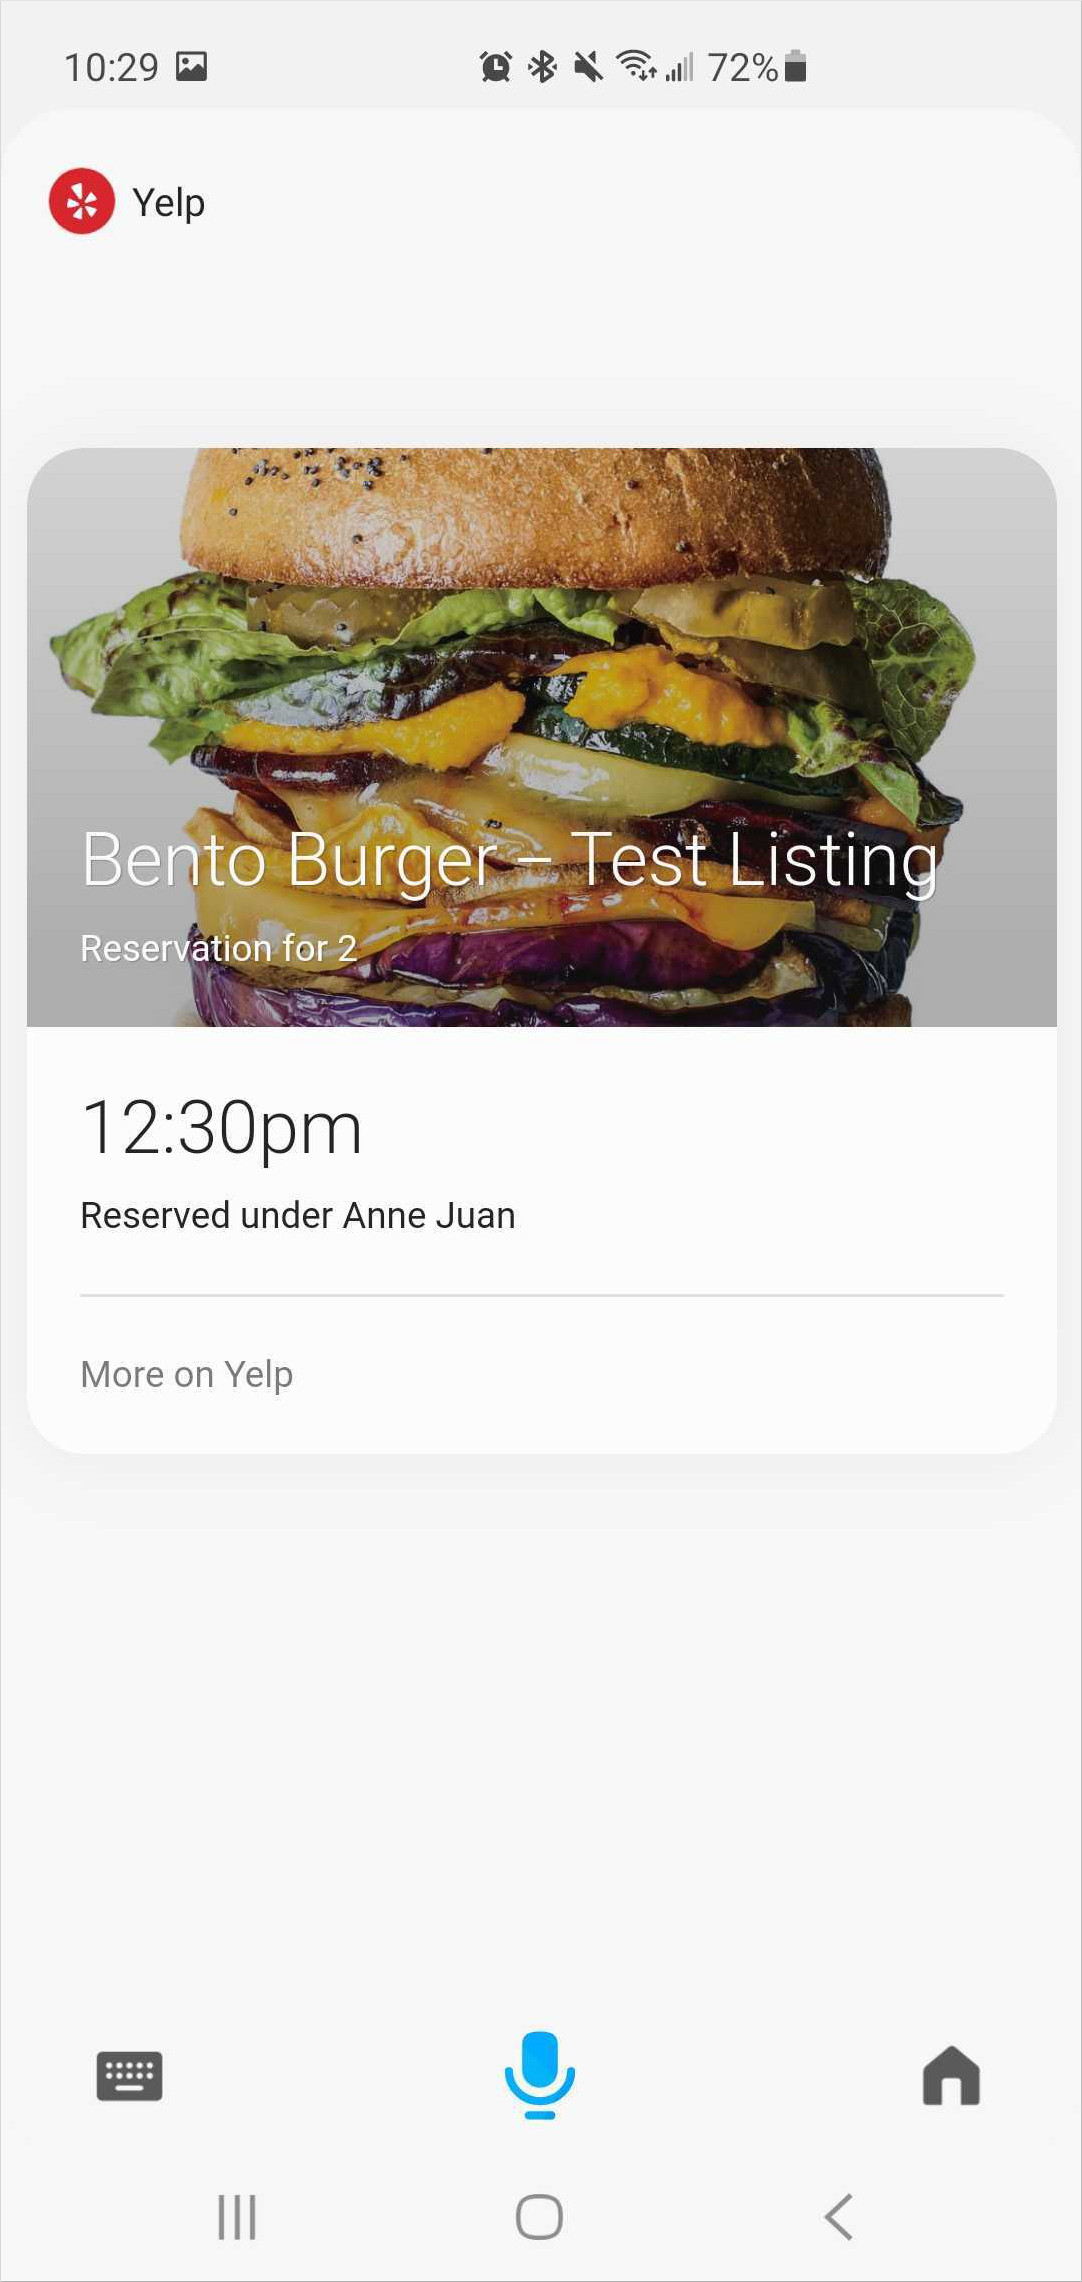
Here are some cards listed in the Scheduled state:
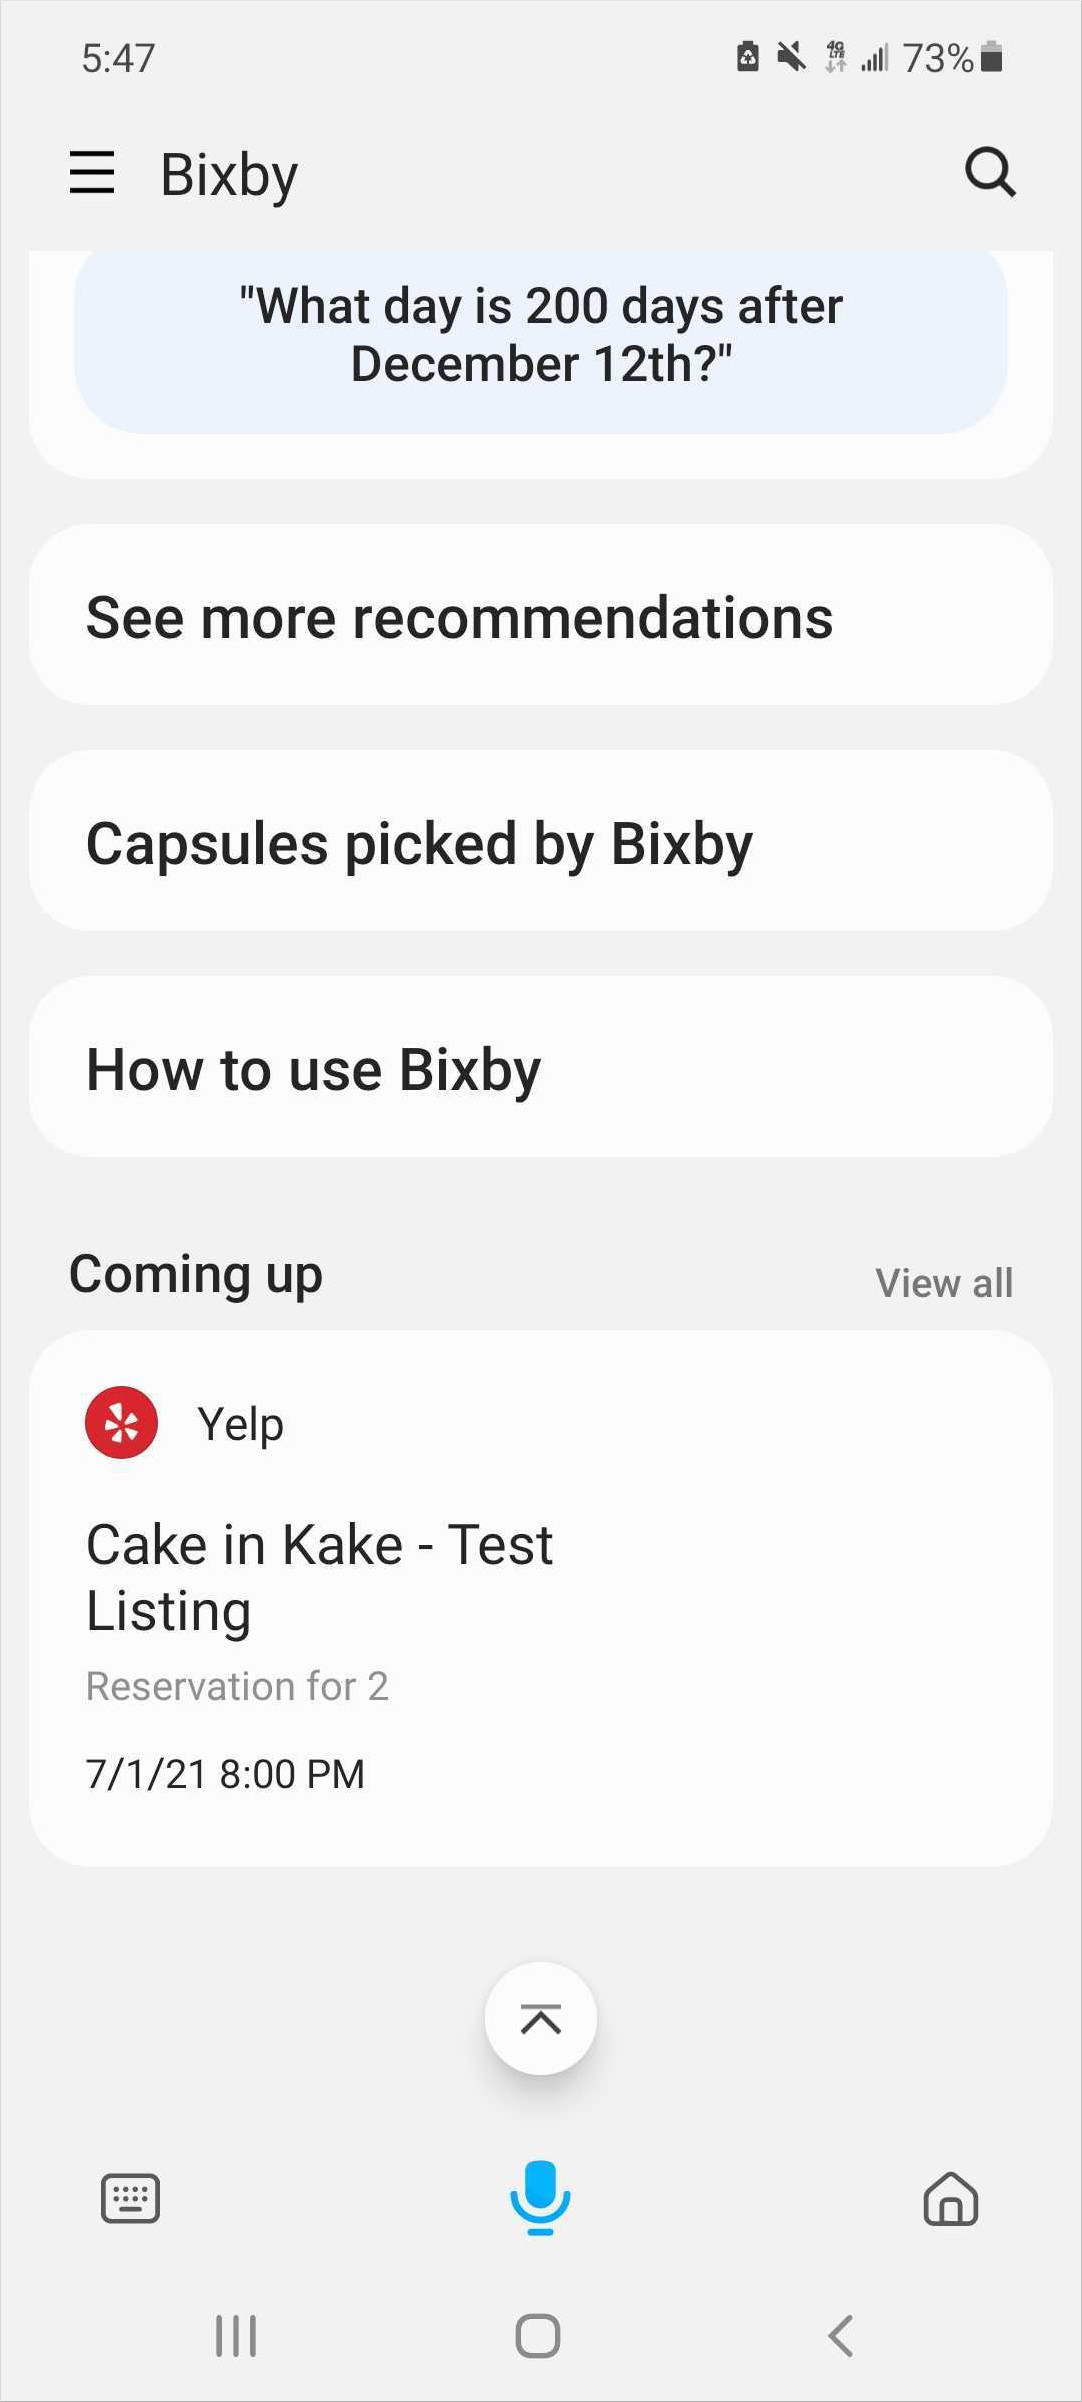
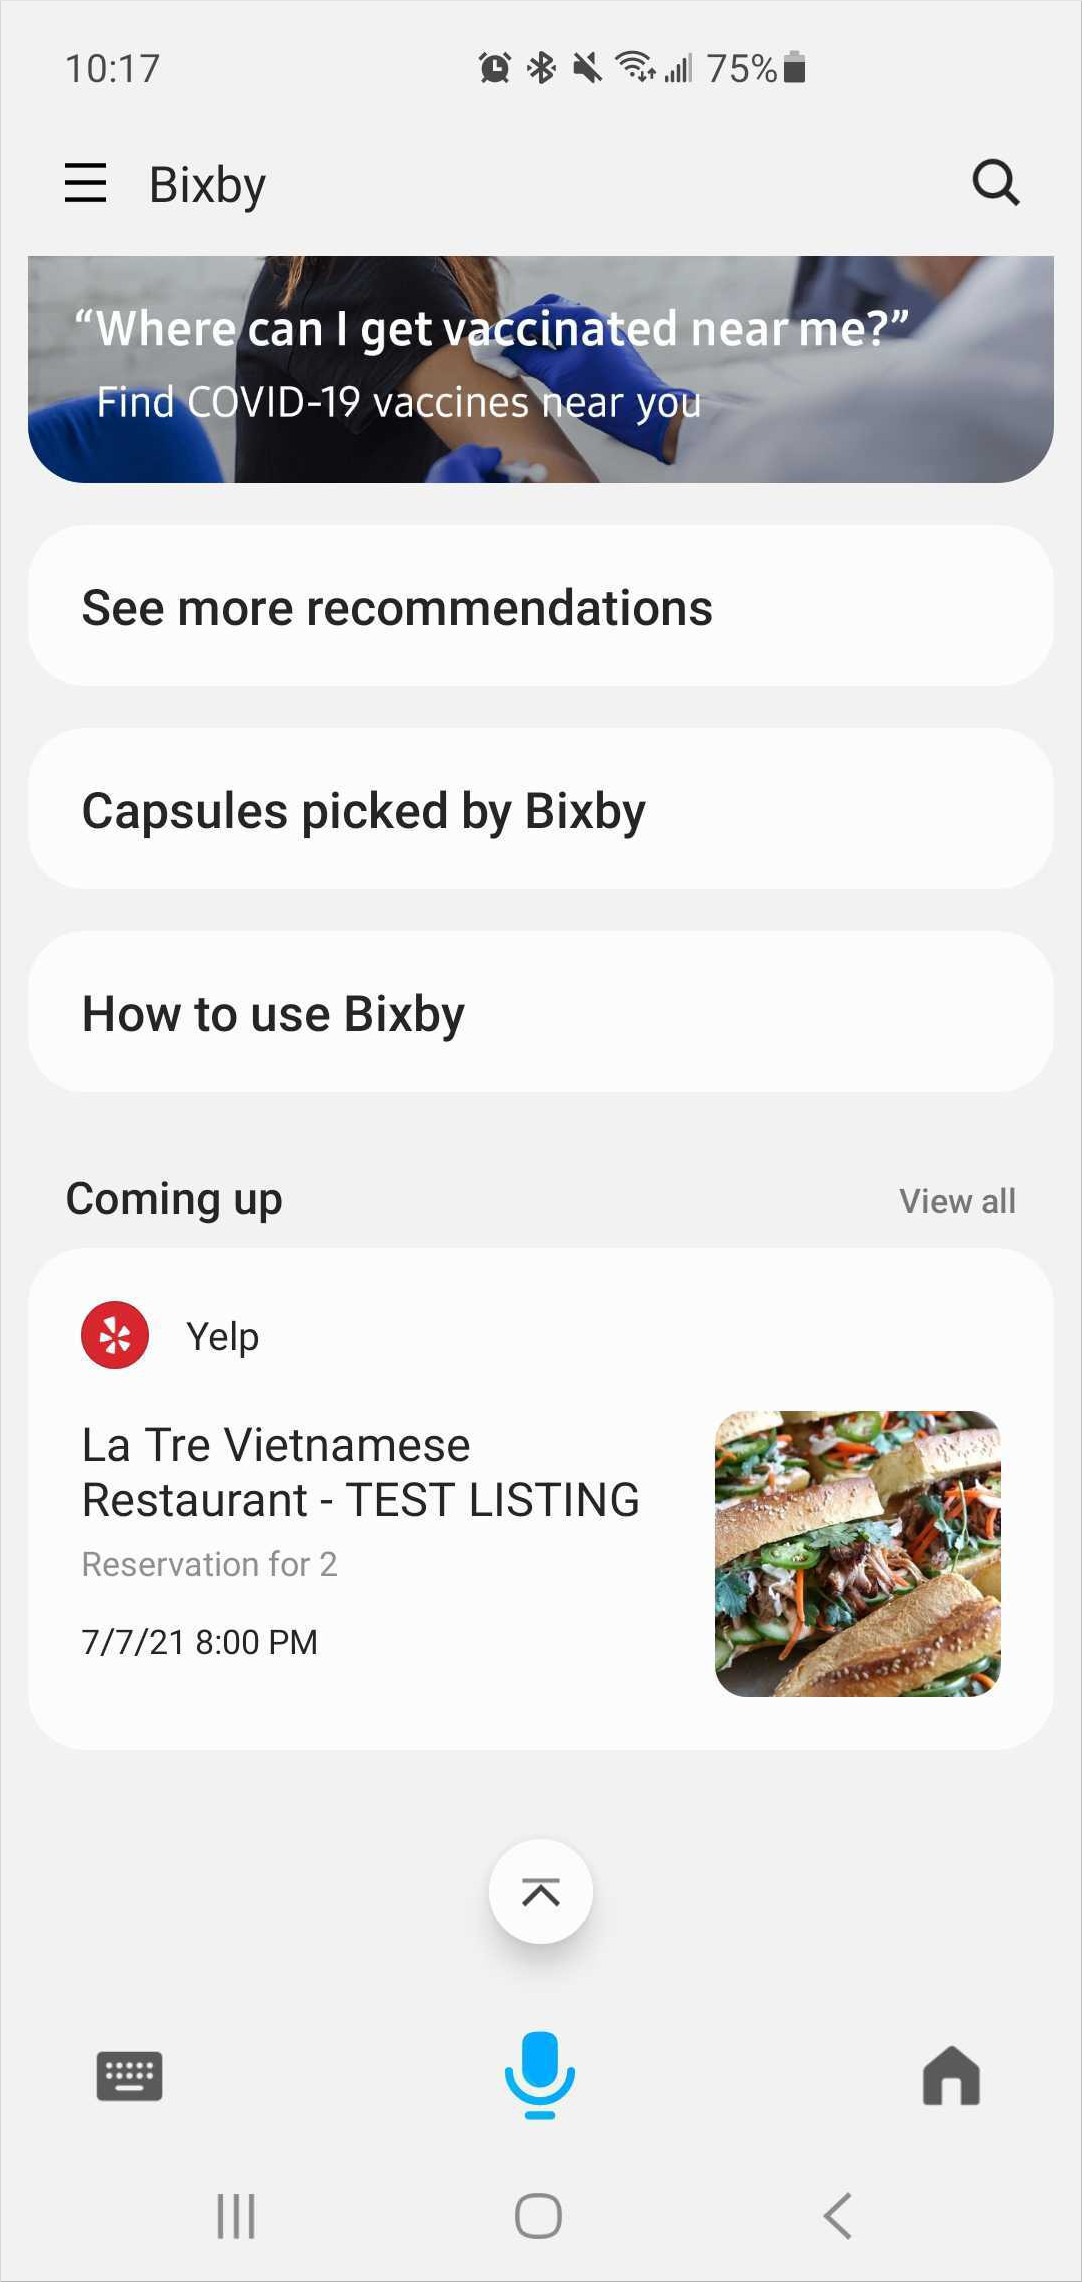

Because the message location can change in Bixby Main page, make sure that the message content is a complete sentence. For example:
- Do: "you have a dentist appointment at 3pm". Bixby's dialog reads Hi Anne, you have a dentist appointment at 3pm.
- Don't: "3pm dentist" Bixby's dialog reads Hi Anne, 3pm dentist
Bixby displays the detail-view in a few situations:
- When displaying a Receipt, at the very end of the transaction.
- If a user taps on an Activity Card for more information.
- If a user taps on a past transaction in their Activities History.
Here are some examples of the detail-view:
Creating an Activity Card
The Activity Card is essentially the user's anchor for following the Activity's life cycle. It will be displayed at the end of the commit phase and the start of the activity phase, normally in the form of a receipt. Additionally, it can be displayed in the Bixby Main page, to provide more information to users.
You can create an Activity Card by defining what layouts and dialogs are created with the summary-view and details-view keys in your *.activity.bxb file. While you can use any layout within the Details View, you should use a card component when possible.
Additionally, you should consider the states that the Activity is in (Scheduled, Relevant, and Recent) to determine what information is displayed and when an activity card displays certain information.
An Activity can be born into a Scheduled or Relevant state, and can freely switch back and forth between these two states. However, once it reaches Recent, the state is terminal and cannot go back to another state.
If the Activity is in state Recent, no Activity Card displays. Users can see their past activities in their transaction history, which is displayed in the Manage tab of the capsule's page.
Within the structures that you create for an Activity, such as a Receipt model, you must set an $id. This $id will help differentiate between different activities for the user. For example, a user might have booked a hotel in November for Thanksgiving and a separate hotel in December for Christmas. In order to keep the reservations distinct, make sure the Activity IDs in the resulting Receipt models for the hotel bookings are unique.
Be aware that a unique $id corresponds to a single Activity Card. Users will see exactly one Activity Card on their device for each unique Activity.
It is highly recommended that the id you use in your activity concepts are consistent with the internal systems that you have. This makes Activities easier to keep track of and will help with any potential debugging. Additionally, this will allow you to look up transactions with the transaction JavaScript API easier.
There are two serialization issues to keep in mind when updating your capsule.
- If you make changes to your Activity models, they need to be backwards compatible in the Bixby system. While it's okay to add new optional properties, deleting any properties or adding new required properties might interfere with older Activities, and Bixby will not be able to read these older receipts.
- Details View for existing receipts can only be computed and rendered if you keep the models of those receipts compatible with new model changes on your end.
When an Activity Card is Displayed
You determine when an Activity Card is displayed and how often it refreshes during the refresh state of an activity through the expires key defined in your *.activity.bxb file. Once an Activity's state expires, it is considered stale, though this does not necessarily mean that the Activity is in the Recent state. The next time that the Activity is refreshed, the state will be re-evaluated.
Because you can pass an expression to the expires key, you can set it to refresh at a consistent interval or make it dependent on another state. The shirt capsule, for example, sets a constant status_refresh_time to 600 seconds (10 minutes) in the capsule.properties file. You need to be mindful of what expression you set, because a lower interval corresponds to higher traffic to the client server for updates. You should also consider user experience. If a user booked a hotel eight months in advance, they don't necessarily need a daily reminder that their trip is coming up until much closer to the actual event.
You additionally control what is displayed with conditionals and the various states that the Activity is in. For example, an activity for a hotel booking should be set to the Scheduled state seven days before the time and should change to Relevant state three days before the time of the booking. In another example, with shirt, conditionals help determine what state the Order structure is in, and the various states determine what information actually gets displayed.
  states {
    if (orderState == 'Ordered') {
      state (Scheduled) {
        expires(statusRefreshTime)
        summary-view {
          message {
            template ("#{value(orderState)} #{value(order)}")
          }
          title {
            template ("#{value(order)}")
          }
          details {
            template ("#{value(orderState)}")
          }
        }
        detail-view {
          render {
            layout-match (this) {
              mode (Details)
            }
          }
        }
      }
    } else-if (orderState == 'Shipped') {
      state (Relevant) {
        expires(statusRefreshTime)
        summary-view {
          message {
            template ("#{value(orderState)} #{value(order)}")
          }
          title {
            template ("#{value(order)}")
          }
          details {
            template ("#{value(orderState)}")
          }
        }
        detail-view {
          render {
            layout-match (this) {
              mode (Details)
            }
          }
        }
      }
    } else { //orderState == 'Delivered' || orderState == 'Cancelled'
      state (Recent) {
        summary-view {
          message {
            template ("#{value(orderState)} #{value(order)}")
          }
          title {
            template ("#{value(order)}")
          }
          details {
            template ("#{value(orderState)}")
          }
        }
        detail-view {
          render {
            layout-match (this) {
              mode (Details)
            }
          }
        }
      }
    }
  }
The Activity Card is only refreshed if the user is currently in Bixby. If the user exits Bixby, then they will not get updates unless they re-open the Bixby Main page. There is no auto-refresh happening in the background. As a service, you should not expect web-service calls to your systems every 5 minutes for a user just because you set the expires key in the *.activity.bxb file to 5 minutes. For each user, Bixby calls your web-service no more than once within a period of expires seconds. For more information, see Refreshing Your Content.
If you are not using refresh, then when a user exits Bixby and comes back, the activity.bxb file is re-evaluated and the state can change then.