
Reusing Content With Macros
There are times when you need to have the same layout or dialog repeated in multiple places. For example, if you're displaying an item for sale, you want to have the same card component set up for the item on the input view where users can buy it and the same card on the confirmation view as users review their cart. Or maybe you format a product name a certain way every time you use it.
This is where macros come in handy! Macros allow you to reuse content in multiple places, which can save you from having to re-do complex logic.
Do not define both layouts and dialogs within a single macro. Doing so will result in an error anywhere the macro is invoked.
While you can still use a template-macro for dialog and a layout-macro for layouts (and define them in their corresponding *-def files), those keys will be deprecated in a future release.
The macro and macro-def keys will be the replacement for the old macros. This guide focuses on how to use these keys for both dialog and layouts.
Macro Definition
You can define a macro for either a layout or a dialog file, but not both. You define it in a macro.bxb file, saved in a locale-specific resources folder or the base folder. Bixby Studio can create layout and dialog macro files for you in the appropriate folders:
- Select Menu > New File.
- Select Layout or Dialog as the file type, and select Macro as the template.
- Edit the name of the file and click Create.
Layout Macros
Layout macros are defined within the macro-def key and allow you to specify several components within a given layout. Unlike a layout-macro, you can specify more than one component within the macro-def.
macro-def (space-resort-details) {
  params {
    param (spaceResort) {
      type (SpaceResort)
      min (Required) max (One)
    }
  }
  content {
    section {
      content {
        image-carousel {
          images (spaceResort.images)
        }
        title-area {
          halign (Center)
          slot1 {
            text {
              value ("#{value(spaceResort.name)}")
              style (Title_L)
            }
          }
          slot2 {
            single-line {
              text {
                value ("#{value(spaceResort.planet)} • #{value(spaceResort.gravity)}g")
                style (Title_XS)
              }
            }
          }
        }
        paragraph {
          value ("#{value(spaceResort.description)}")
          style (Detail_M)
        }
        partitioned {
          content {
            for-each (spaceResort.attributes) {
              as (attribute) {
                single-line {
                  text {
                    value ("#{value(attribute)}")
                    style (Detail_L)
                  }
                }
              }
            }
          }
        }
      }
    }
  }
}
The macro can be used within a larger layout or view file:
The params key starts a block that lets you specify parameters for the macro. These parameters are defined similarly to properties in structure concepts:
- a
typethat matches either a primitive likeIntegerorText, or a previously-defined concept, likeSpaceResort minto set optionality toRequiredorOptionalmaxto set cardinality toOneorMany
You cannot have a macro with the same ID if the macro is defined in the same resource folder. For example, if you have a macro with the ID "this-test-macro" in the bixby-mobile-en-US target, you cannot have another different macro with the same name in that target.
However, if the macro's target is in a higher level resource folder, the more specific target will override the more general target. For example, say you have a macro in bixby-mobile-en and another macro in bixby-mobile-en-US, both with the ID "this-test-macro". The macro in the bixby-mobile-en-US target will render for the bixby-mobile-en-US target, but the bixby-mobile-en macro will render for the bixby-mobile-en-GB target.
Macros with the same ID but in different targets (for example, bixby-mobile-ko-KR and bixby-mobile-en-US) are allowed and are encouraged, especially when localizing or handling development for multiple devices.
Dialog Macros
Dialog macros are defined within the macro-def key and allow you to specify various dialogs.
With the macro-def key:
macro-def (id1) {
  content {
    template (ID1 text)
  }
}
Here is another example that also uses conditionals:
macro-def (id2) {
  params {
    param (x) {
      type (example.testNamedDialog.TestConcept)
      min (Required)
      max (One)
    }
    param (t) {
      type (Text)
    }
  }
  content {
    if (exists(t)) {
      template ("#{t} : #{value(x)}")
    } else {
      template ("#{value(x)}")
    }
  }
}
For a more complete working example, see the Dialog Affirmation sample capsule.
Parameter Default Values
Your macro definition (for both dialog and layouts) can include a default key in a param block to set a default value for that parameter. This sets a default value of false for the fromQuiz parameter in the example.movieAgent sample capsule:
    param (fromQuiz) {
      type (core.Boolean)
      min (Optional)
      max (One)
      default (false)
    }
You can set default values for these types of values:
TextBooleanIntegerDecimal
Macro Usage
In order to actually use the macro, you need to call it at appropriate places where the macro key is valid.
Layout Macro Usage
Use the macro key in the render block of your views to invoke macros. Use param blocks to pass values to the macro's parameters. You can also adjust your layouts with layout modes.
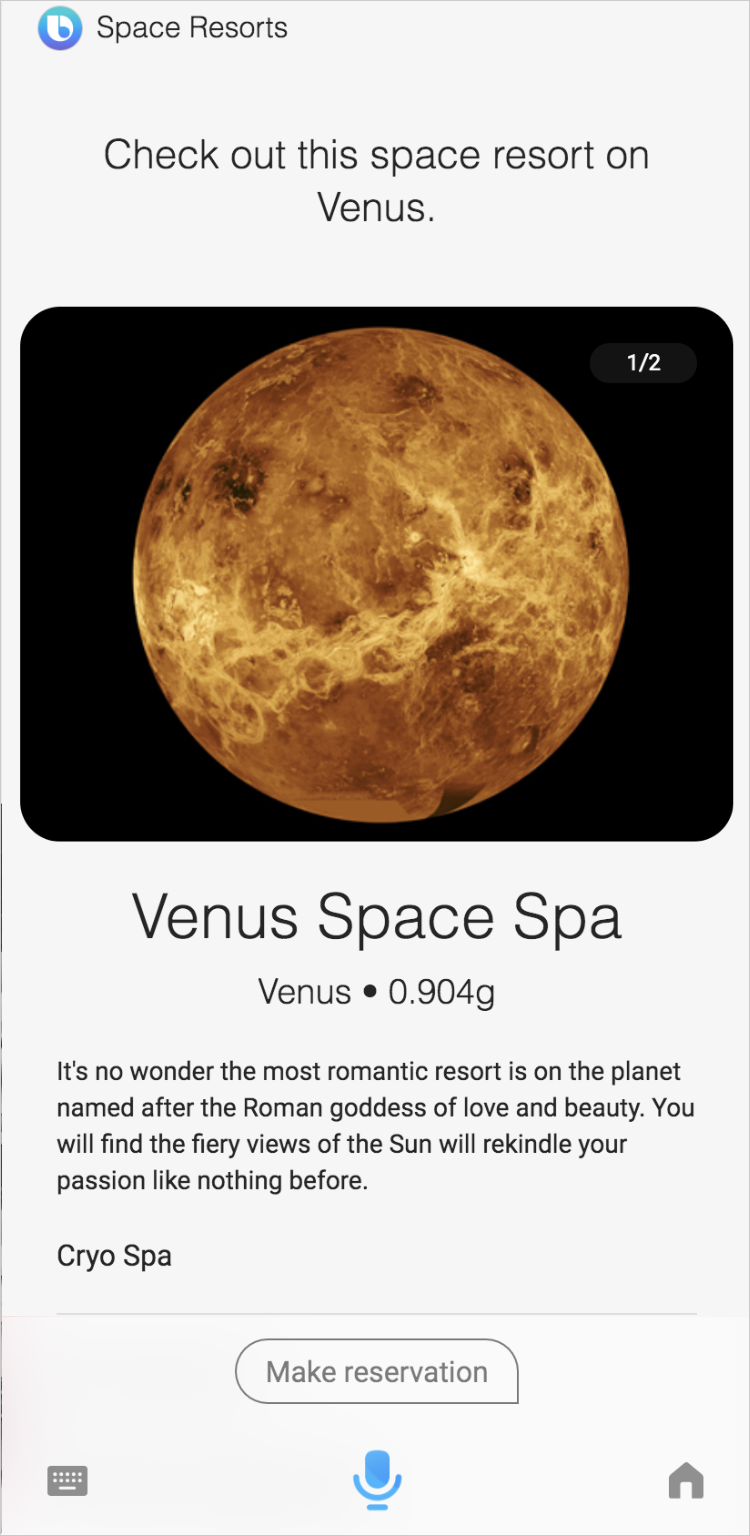
This example shows a result view that can be either a list of search results, in which case list-of is used to construct a list of space-resort-summary layouts for each resort, or a single space-resort-detail layout if only a single result has been returned.
Alternatively, here is how you would call just the macro:
result-view {
match: SpaceResort (result)
render {
if (size (result) > 1)) {
list-of (result) {
where-each (item) {
macro (space-resort-summary) {
param (spaceResort) {
expression(item)
}
}
}
}
} else-if (size (result) == 1) {
layout {
macro (space-resort-details) { // calling a more generic macro that defines a "section"
param (spaceResort) {
expression (result)
}
}
}
}
}
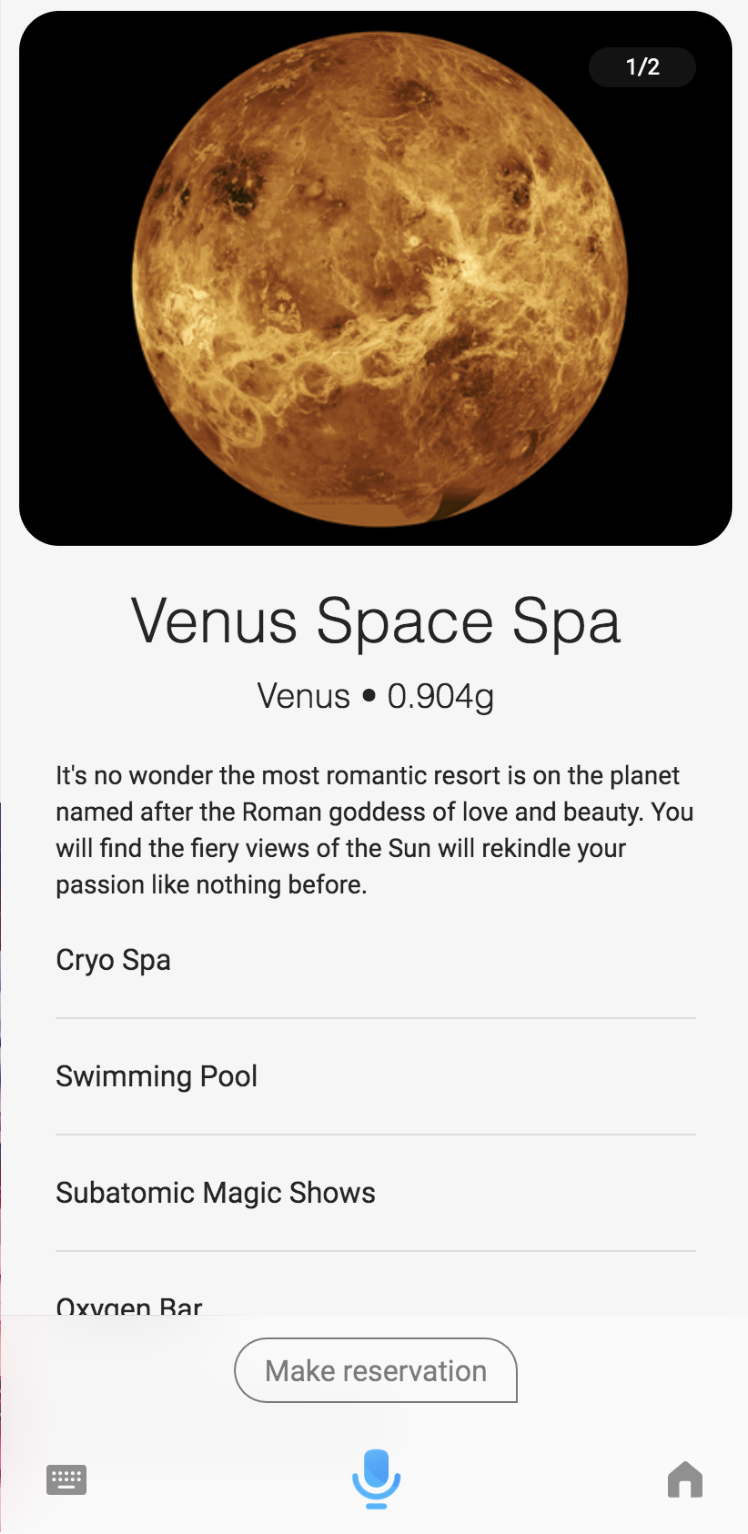
}Here is what the layout would look like, which has the space-resort-details information displayed above:
Macros from capsules that you import but do not alias must include the full namespace:
macro (example.SpaceResort.space-resort-summary)Layout Modes
Conditional blocks can test which, if any, layout mode is being used by using the special variable $layoutMode.
if ($layoutMode == 'Details') {
  // ...
}
The conditions require one of these enums for testing:
SummaryDetailsConfirmationInput
Prompt mode can change between views, so if your macro is used across multiple layout modes, you might want to test against the $promptMode.
Dialog Macro Usage
You can invoke a dialog macro by calling the macro with the ID you specified in your macro-def:
dialog (Result) {
  match: example.testNamedDialog.TextConcept (this)
  macro (id2) {
    param (x) {
      expression (this)
    }
    param (t) {
      literal ("some text")
    }
  }
}You cannot have a macro with the same ID if the macro is defined in the same resource folder. For example, if you have a macro with the ID "this-test-macro" in the bixby-mobile-en-US target, you cannot have another different macro with the same name in that target.
However, if the macro's target is in a higher level resource folder, the more specific target will override the more general target. For example, say you have a macro in bixby-mobile-en and another macro in bixby-mobile-en-US, both with the ID "this-test-macro". The macro in the bixby-mobile-en-US target will render for the bixby-mobile-en-US target, but the bixby-mobile-en macro will render for the bixby-mobile-en-GB target.
Macros with the same ID but in different targets (for example, bixby-mobile-ko-KR and bixby-mobile-en-US) are allowed and are encouraged, especially when localizing or handling development for multiple devices.
If later you need to change this complex logic, you only need to change it in the macro definition once.
You can use template macros anywhere you can use a template, including in views:
result-view {
  match {
    Receipt (receipt) {
      min (Required)
      max (One)
    }
  }

  message {
    macro (RECEIPT_RESULT) {
      param (receipt) {
        expression (receipt)
      }
    }
  }

  render {
    layout {
      macro (receipt-header) {
        param (receipt) {
          expression (receipt)
        }
      }
      macro (receipt-contact-information) {
        param (receipt) {
          expression (receipt)
        }
      }
      macro (receipt-order-total) {
        param (receipt) {
          expression (receipt)
        }
      }
    }
  }
}Note that you can also use macros without any parameters, and you can declare more than one in a single dialog or macro file:
// In a hello-dialog.macro.bxb file
macro-def (HelloWorld) {
  content {
    template ("Hello World!")
  }
}

macro-def (WelcomeMessage) {
  content {
    template ("Welcome to the wonderful world of Bixby!")
  }
}
Not only is this feature useful for composing complicated dialog, but it is also useful for localization. When a capsule is multi-locale, you can factor out strings into macros in separate files, which can then be translated by translation services. You can then place the translated versions in the appropriate resources locale folder. If you do so, ensure that the resulting composed strings work properly in the locale you are targeting.
Here is an example for a capsule in which you declare several dialog macros for contact information:
macro-def (ContactInformation) {
  content {
    template ("Contact information")
  }
}

macro-def (Name) {
  content {
    template ("Name")
  }
}

macro-def (PhoneNumber) {
  content {
    template ("Phone number")
  }
}

macro-def (Email) {
  content {
    template ("Email")
  }
}
Each dialog macro can include related parameters, which consist of a parameter name param, associated type, and cardinality rules (min and max).
There is also always corresponding content, which is where you include the text of the dialog.
And this is how you can invoke dialog macros within a macro-def, which uses dialog macros to create contact information in a receipt:
macro-def (receipt-contact-information) {
  params {
    param (receipt) {
      type (Receipt)
      min (Required) max (One)
    }
  }
  content {
    section {
      title {macro (ContactInformation)}
      content {
        partitioned {
          content {
            cell-area {
              slot2 {
                content {
                  order (SecondaryPrimary)
                  secondary {
                    macro (Name)
                  }
                  primary {
                    template ("[#{value(receipt.buyer.firstName)} #{value(receipt.buyer.lastName)}]")
                  }
                }
              }
            }
            cell-area {
              slot2 {
                content {
                  order (SecondaryPrimary)
                  secondary {
                    macro (PhoneNumber)
                  }
                  primary {
                    template ("[#{value(receipt.buyer.phoneInfo.number)}]")
                  }
                }
              }
            }
            cell-area {
              slot2 {
                content {
                  order (SecondaryPrimary)
                  secondary {
                    macro (Email)
                  }
                  primary {
                    template ("[#{value(receipt.buyer.emailInfo.address)}]")
                  }
                }
              }
            }
          }
        }
      }
    }
  }
}Macro Name-Spacing
Macros follow the same name-spacing rules that apply to model references. This means you must qualify macros that you import, but not those that are local to your capsule.
Take, for example, a capsule called example.capsule1 that defines a macro template1. If you want to import template1 into another capsule called example.capsule2, you must fully qualify it as shown here:
macro(example.capsule1:template1)
However, if you want to use that same macro within example.capsule1 itself, you should use the unqualified notation:
macro(template1)
You can also use an alias to qualify template macros. For example, if example.capsule2 imports example.capsule1 as aliasedcapsule, you can then invoke a macro within it using the alias:
macro(aliasedcapsule:template1)
Why Use Macros
As mentioned previously, macros in general are useful for reusing content in several places.
Layout macros are useful in reusing content that can be placed in multiple places. They can aid in rendering content with complex logic. For example, in the shirt Sample Capsule walkthrough, the confirmation view varies only in the message, depending on if the order was first made or if it was updated. The use of a macro lets you reuse the majority of the layout, but with the differing messages depending on the match-pattern, which calls the appropriate confirmation view.
Dialog macros allow you to compose complicated dialogs, as seen in previous examples.
Macros are useful when handling various languages and locales. If you are creating a capsule that should work in different locales, you can tweak a view but still display the same components by using macros. For example, you might have a compound card that displays various flowers for order. The image card within that compound card might have the same information, no matter what region you are in: a picture of the arrangement being sent, the name of the arrangement, and a price. However, the text in the attribution-link might differ because where you punch users out to might depend on the local florists available in that region.
It is also useful for localization and multiple devices. When a capsule supports multiple locales or multiple devices, you can factor out strings into macros in separate files.
For localization in particular, the strings in these separate macros can be translated by translation services. You can then place the translated versions in the appropriate resources locale folder. Similarly for multiple devices, you can tweak the dialog depending on the user experience, such as hands-free list navigation dialog versus a touch-based dialog or UI strings, and put them in the appropriate resources device folder. If you do so, ensure that the resulting composed strings work properly in the locales and devices you are targeting by testing your capsule with the Simulator.
Here is an example for a capsule in which you declare several dialog macros for contact information, which could easily be used for translation:
macro-def (ContactInformation) {
  content {
    template ("Contact information")
  }
}

macro-def (Name) {
  content {
    template ("Name")
  }
}

macro-def (PhoneNumber) {
  content {
    template ("Phone number")
  }
}

macro-def (Email) {
  content {
    template ("Email")
  }
}
For another example of using macros with dialog, see the Dialog Affirmations sample capsule.
For multiple devices in particular, you can tailor the dialog and layouts depending on the hands-free experience you want to create or the screen size available. For example, when you are displaying a list of results, you might want to use image cards on devices with larger screens, but for a watch, you might want to use a thumbnail card to display content because you want to use smaller images. You can use macros here to repeat the title-area content.